One of the better bits of wargaming for me is seeing two (or more) nicely painted armies on a well modelled and nicely painted board with nicely painted scenery, Part of this is due to being spoiled growing up, playing on boards and with scenery made by my dad who routinely won best-of-show awards for the demonstration games he took to wargames shows (and still does, pending the resumption of wargames shows).
Now that I’ve got some space, one of the things I’ve wanted to do was to build my own wargaming table. I’ve slowly been collecting scenery and doing tests here and there but nothing cohesive. For the last couple of weeks, I’ve been having a weekly games night with my dad and we’d played Warhammer 40,000 with a hodgepodge collection of my scenery for two weeks and a desert mat I have, but it wasn’t quite the same as a proper sculpted board. We were going to play Saga the following week, and whilst I have a nice collection of viking inspired buildings I didn’t have a grass mat.
I did however have four two foot square foamex tiles sitting unused in the workshop.
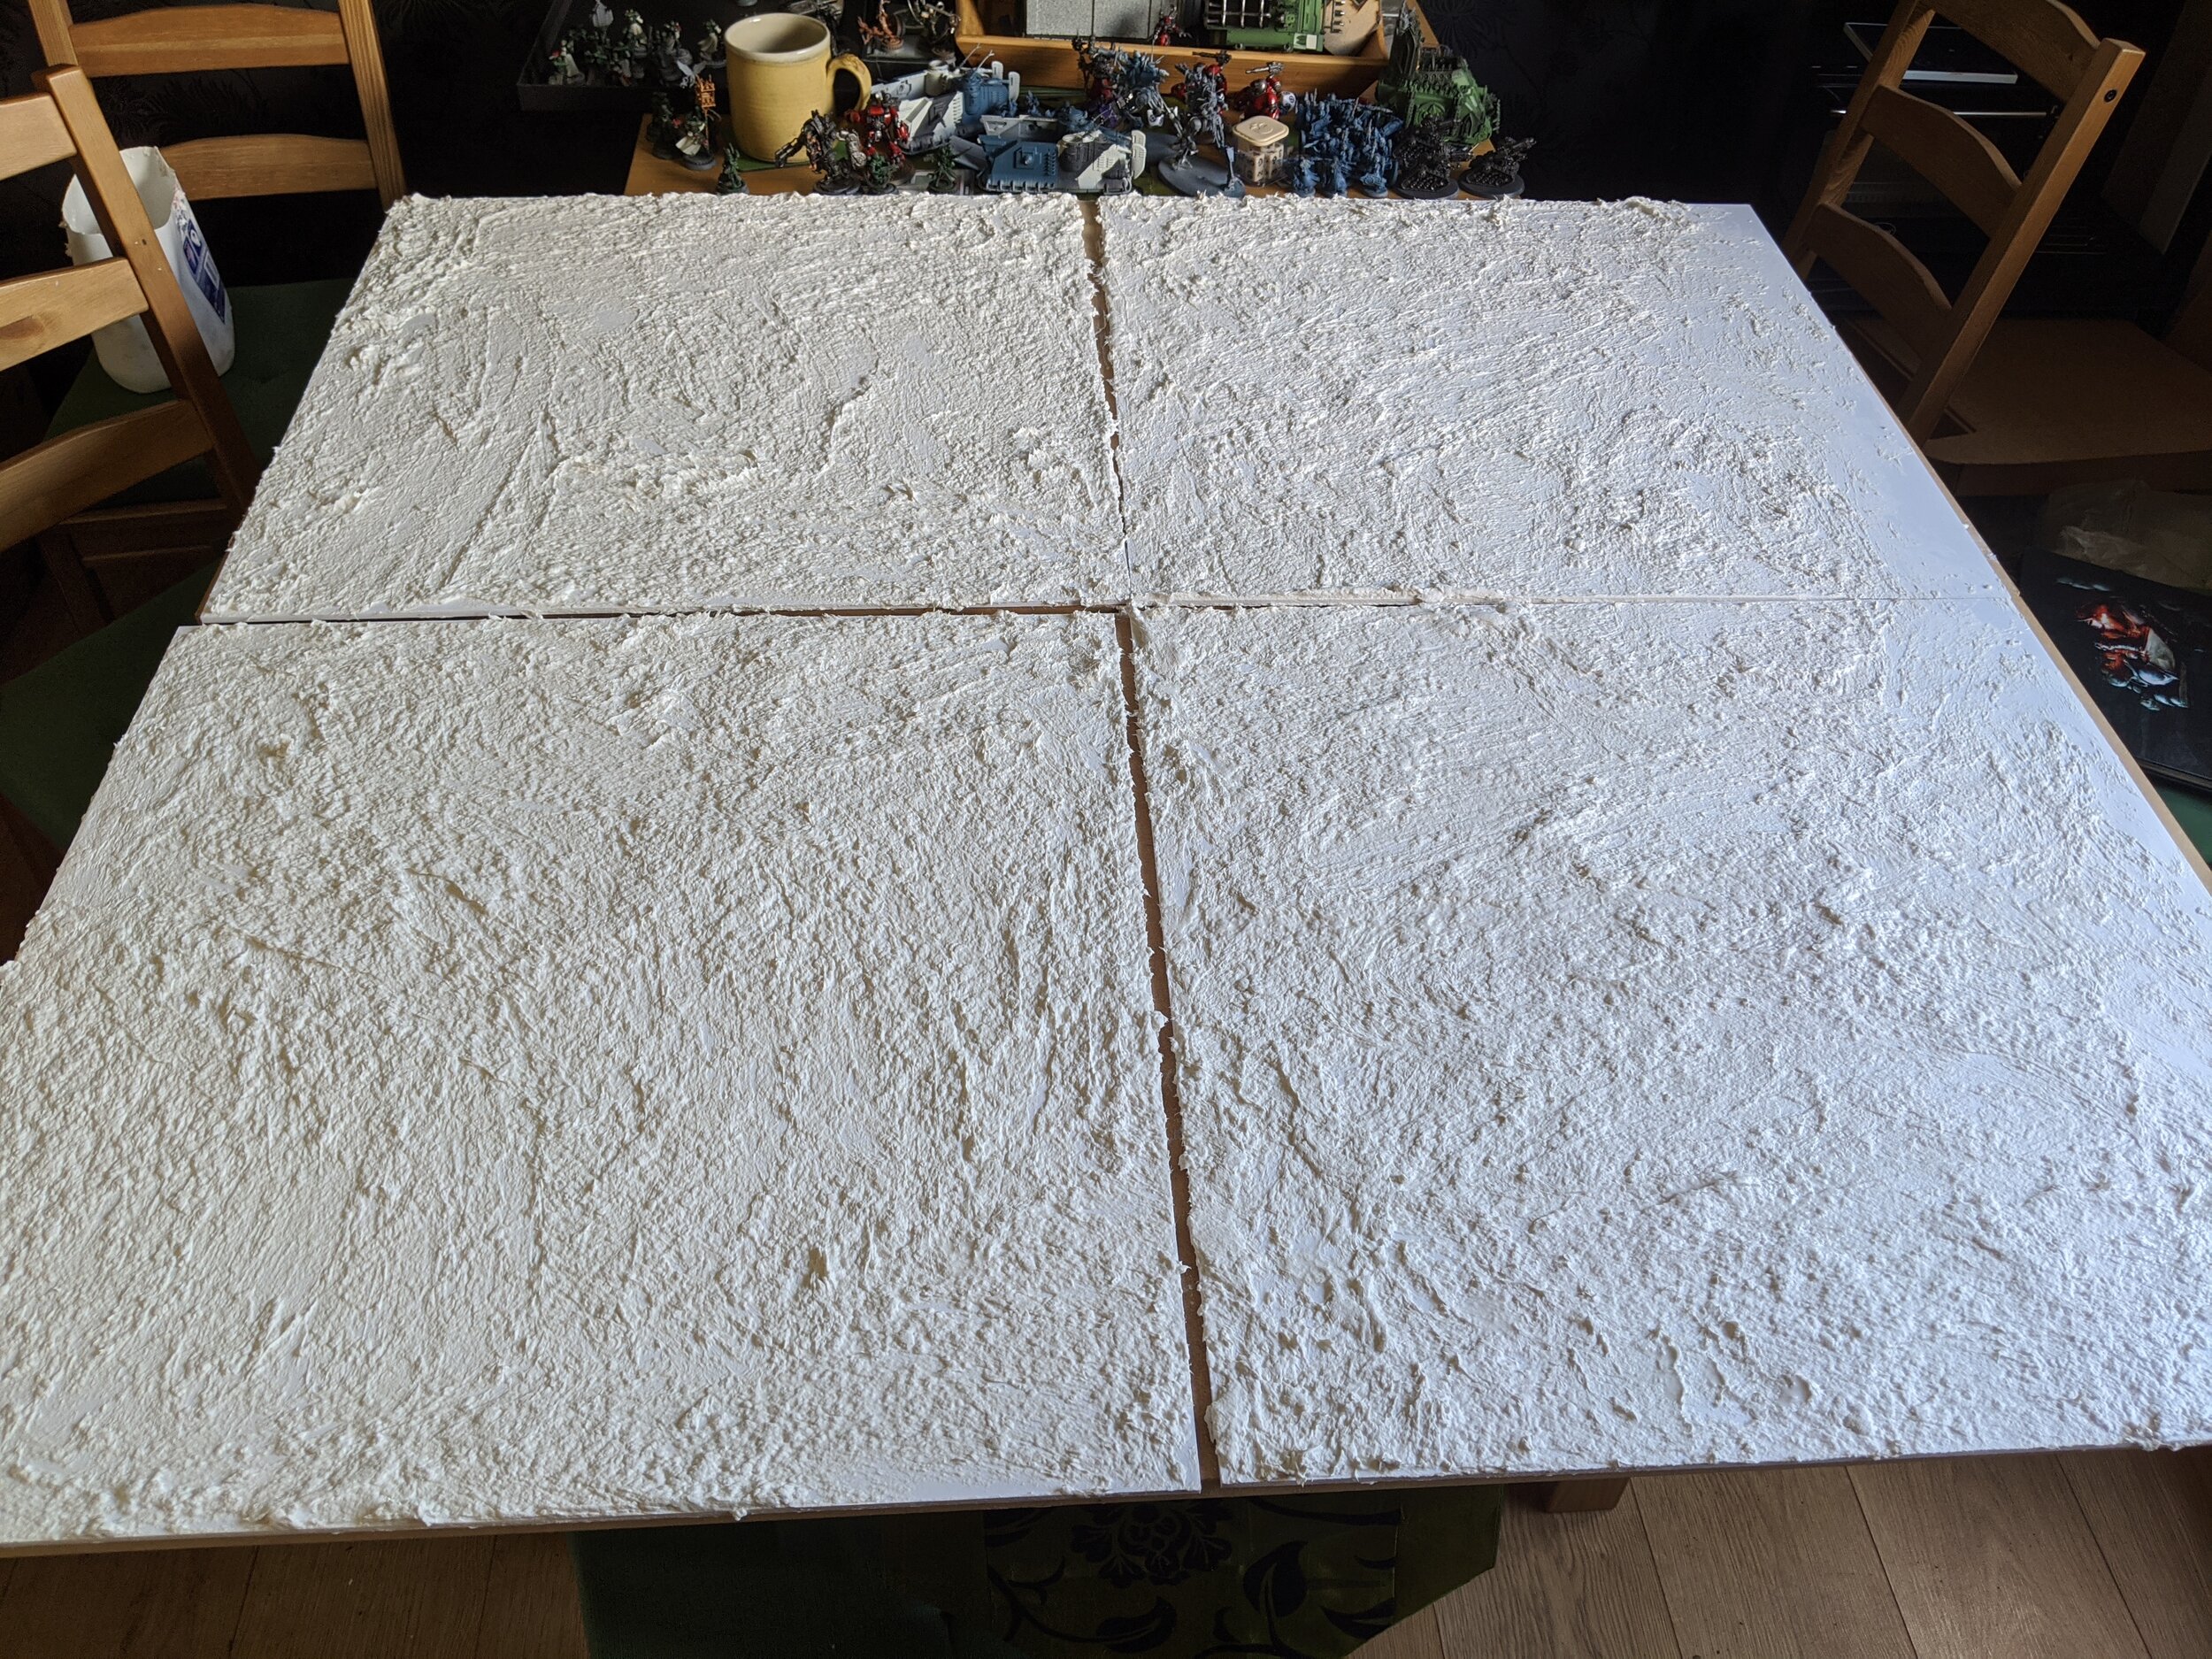
Step one was to cover the entire surface with sculptamold. It’s a mix of clay, plaster and paper fibres that is very easy to give a ground-like texture. It’s used a lot by the Boulder Creek Railroad youtube channel and has very quickly become my favourite material for this sort of application. You glob it on, and spread it around until it’s vaguely flat. You can go in and smooth it as it dries but here I want that lumpy, uneven texture.
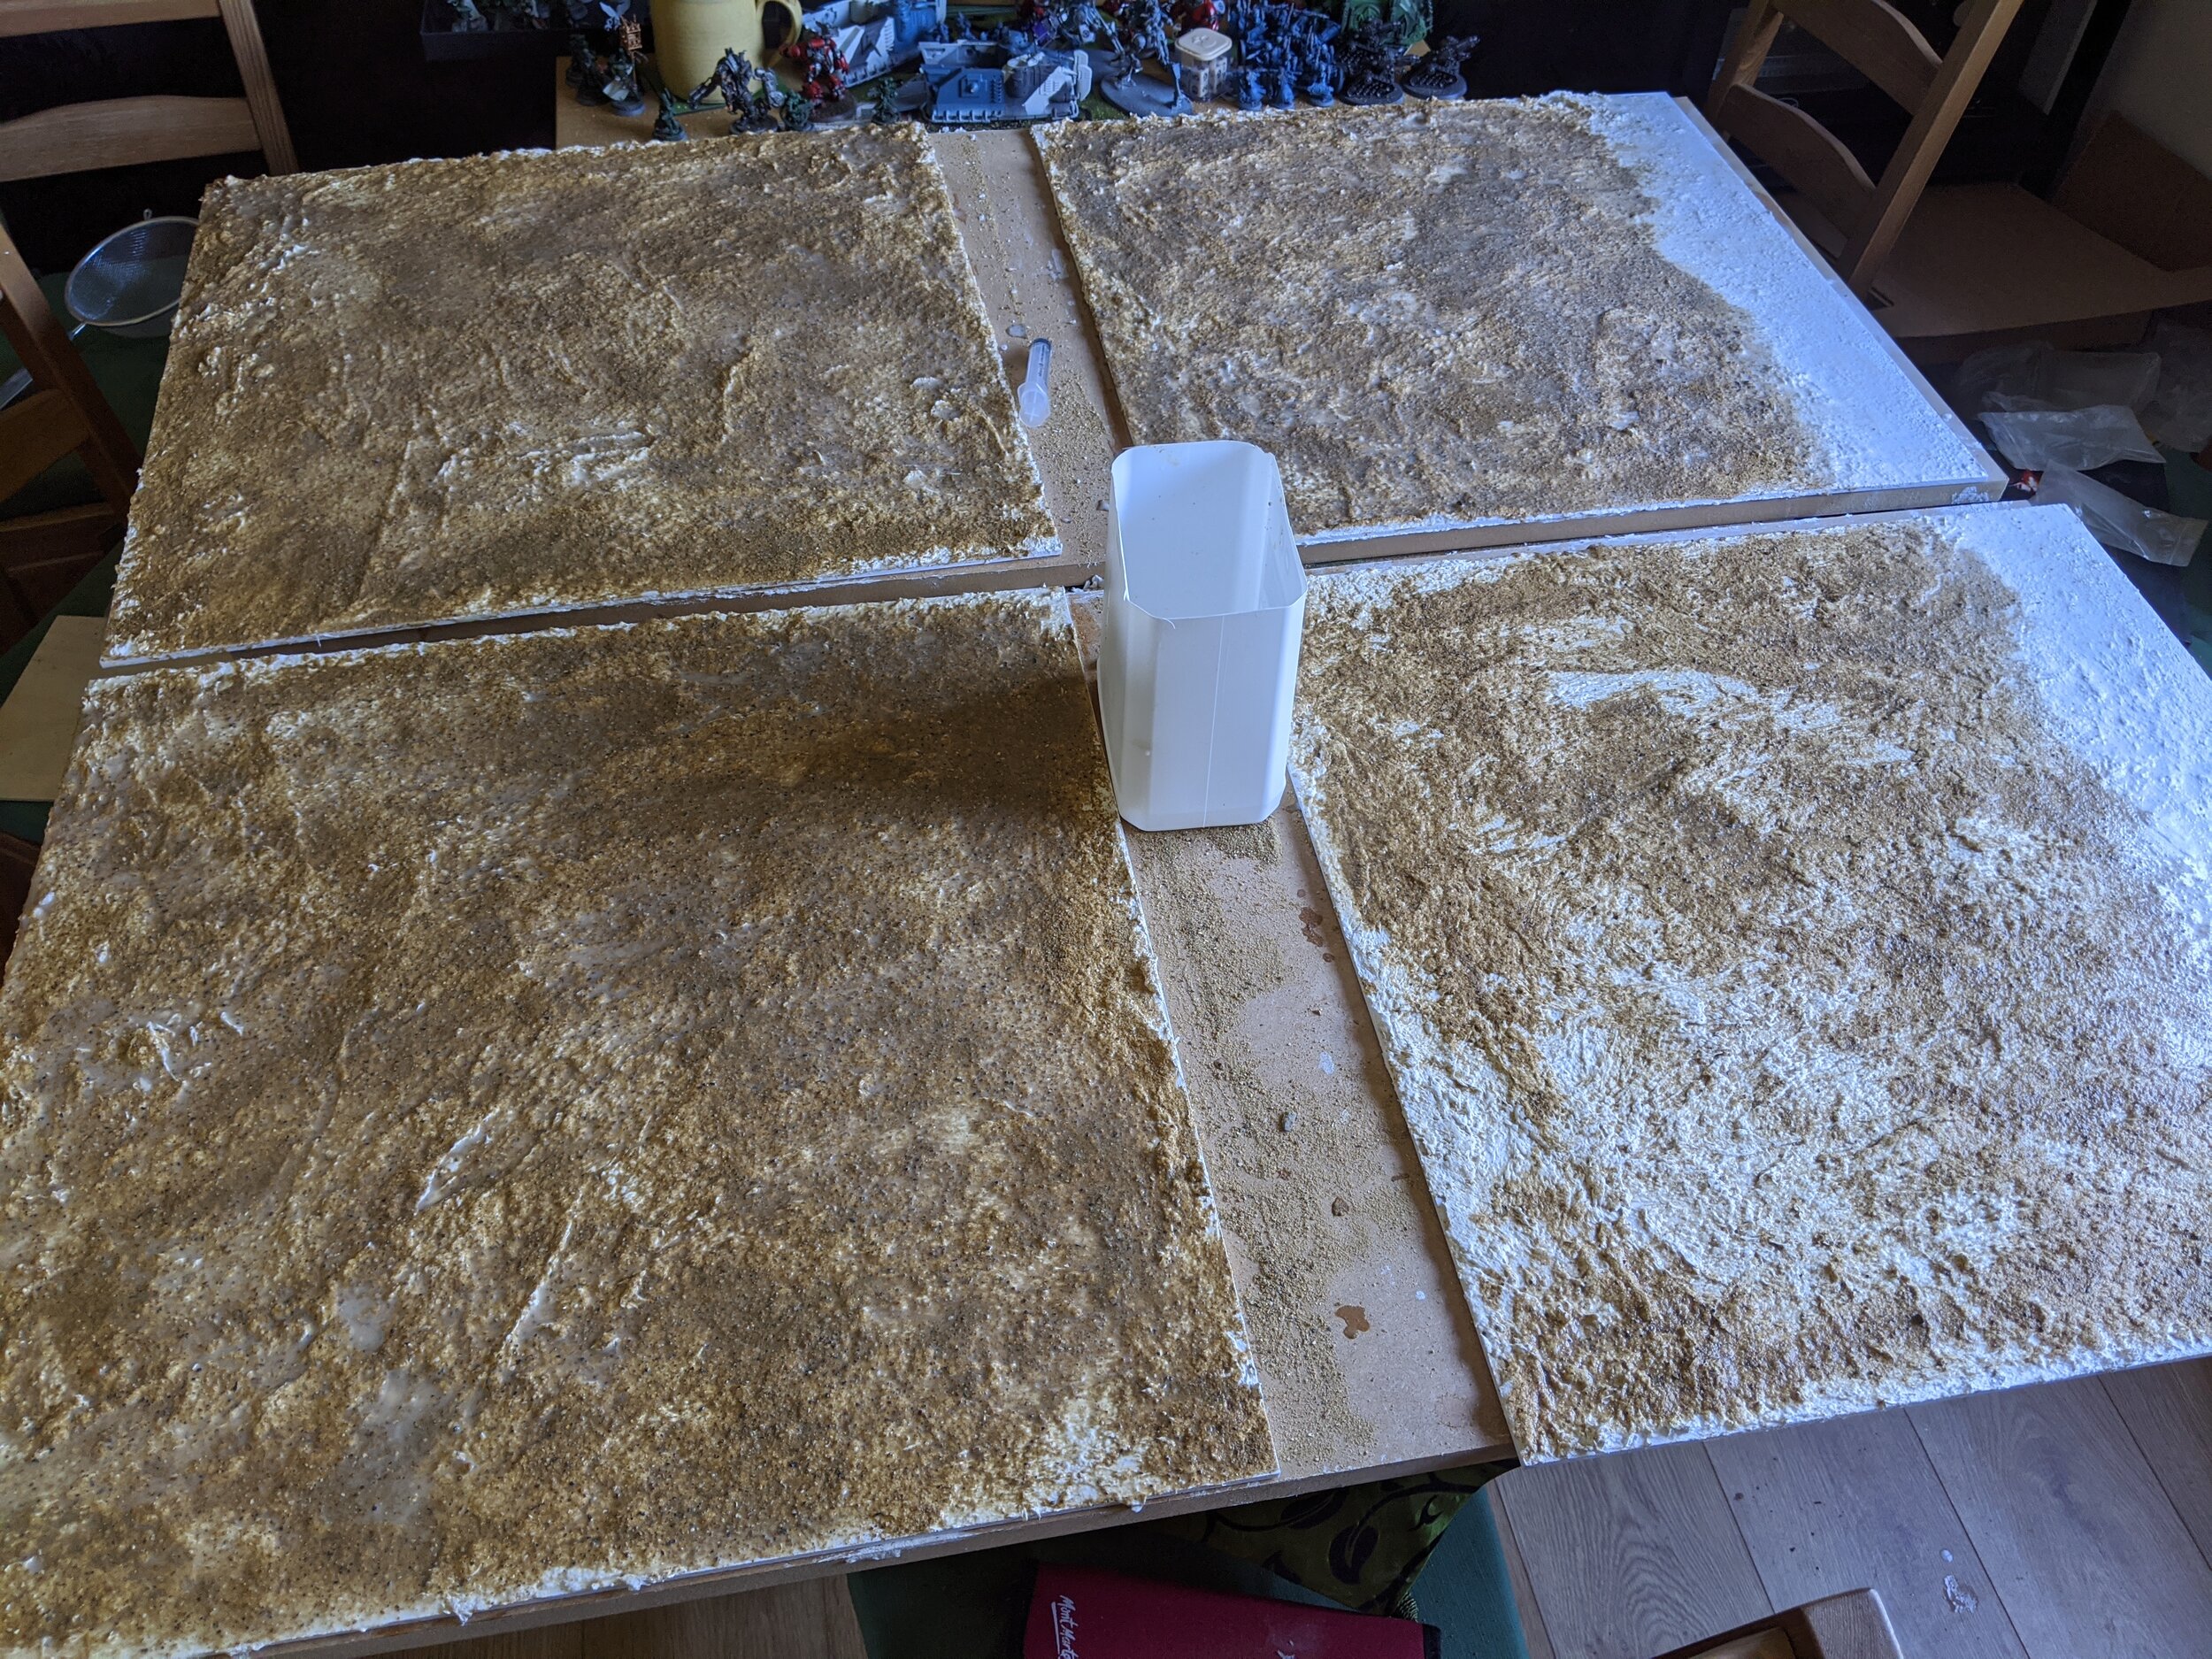
Next up, sand was applied to all the areas that are going to be dirt. It’s applied over slightly thinned PVA and then sealed with a second application of PVA, thinned about 60-30-10 water to PVA to isopropyl alcohol. The alcohol helps it seep into the sand, rather than sit on top of it. On the near edge, the sand was replaced with marble powder to try and make a little beach or riverbank. This worked alright, but also you don’t see much of it in the final board.
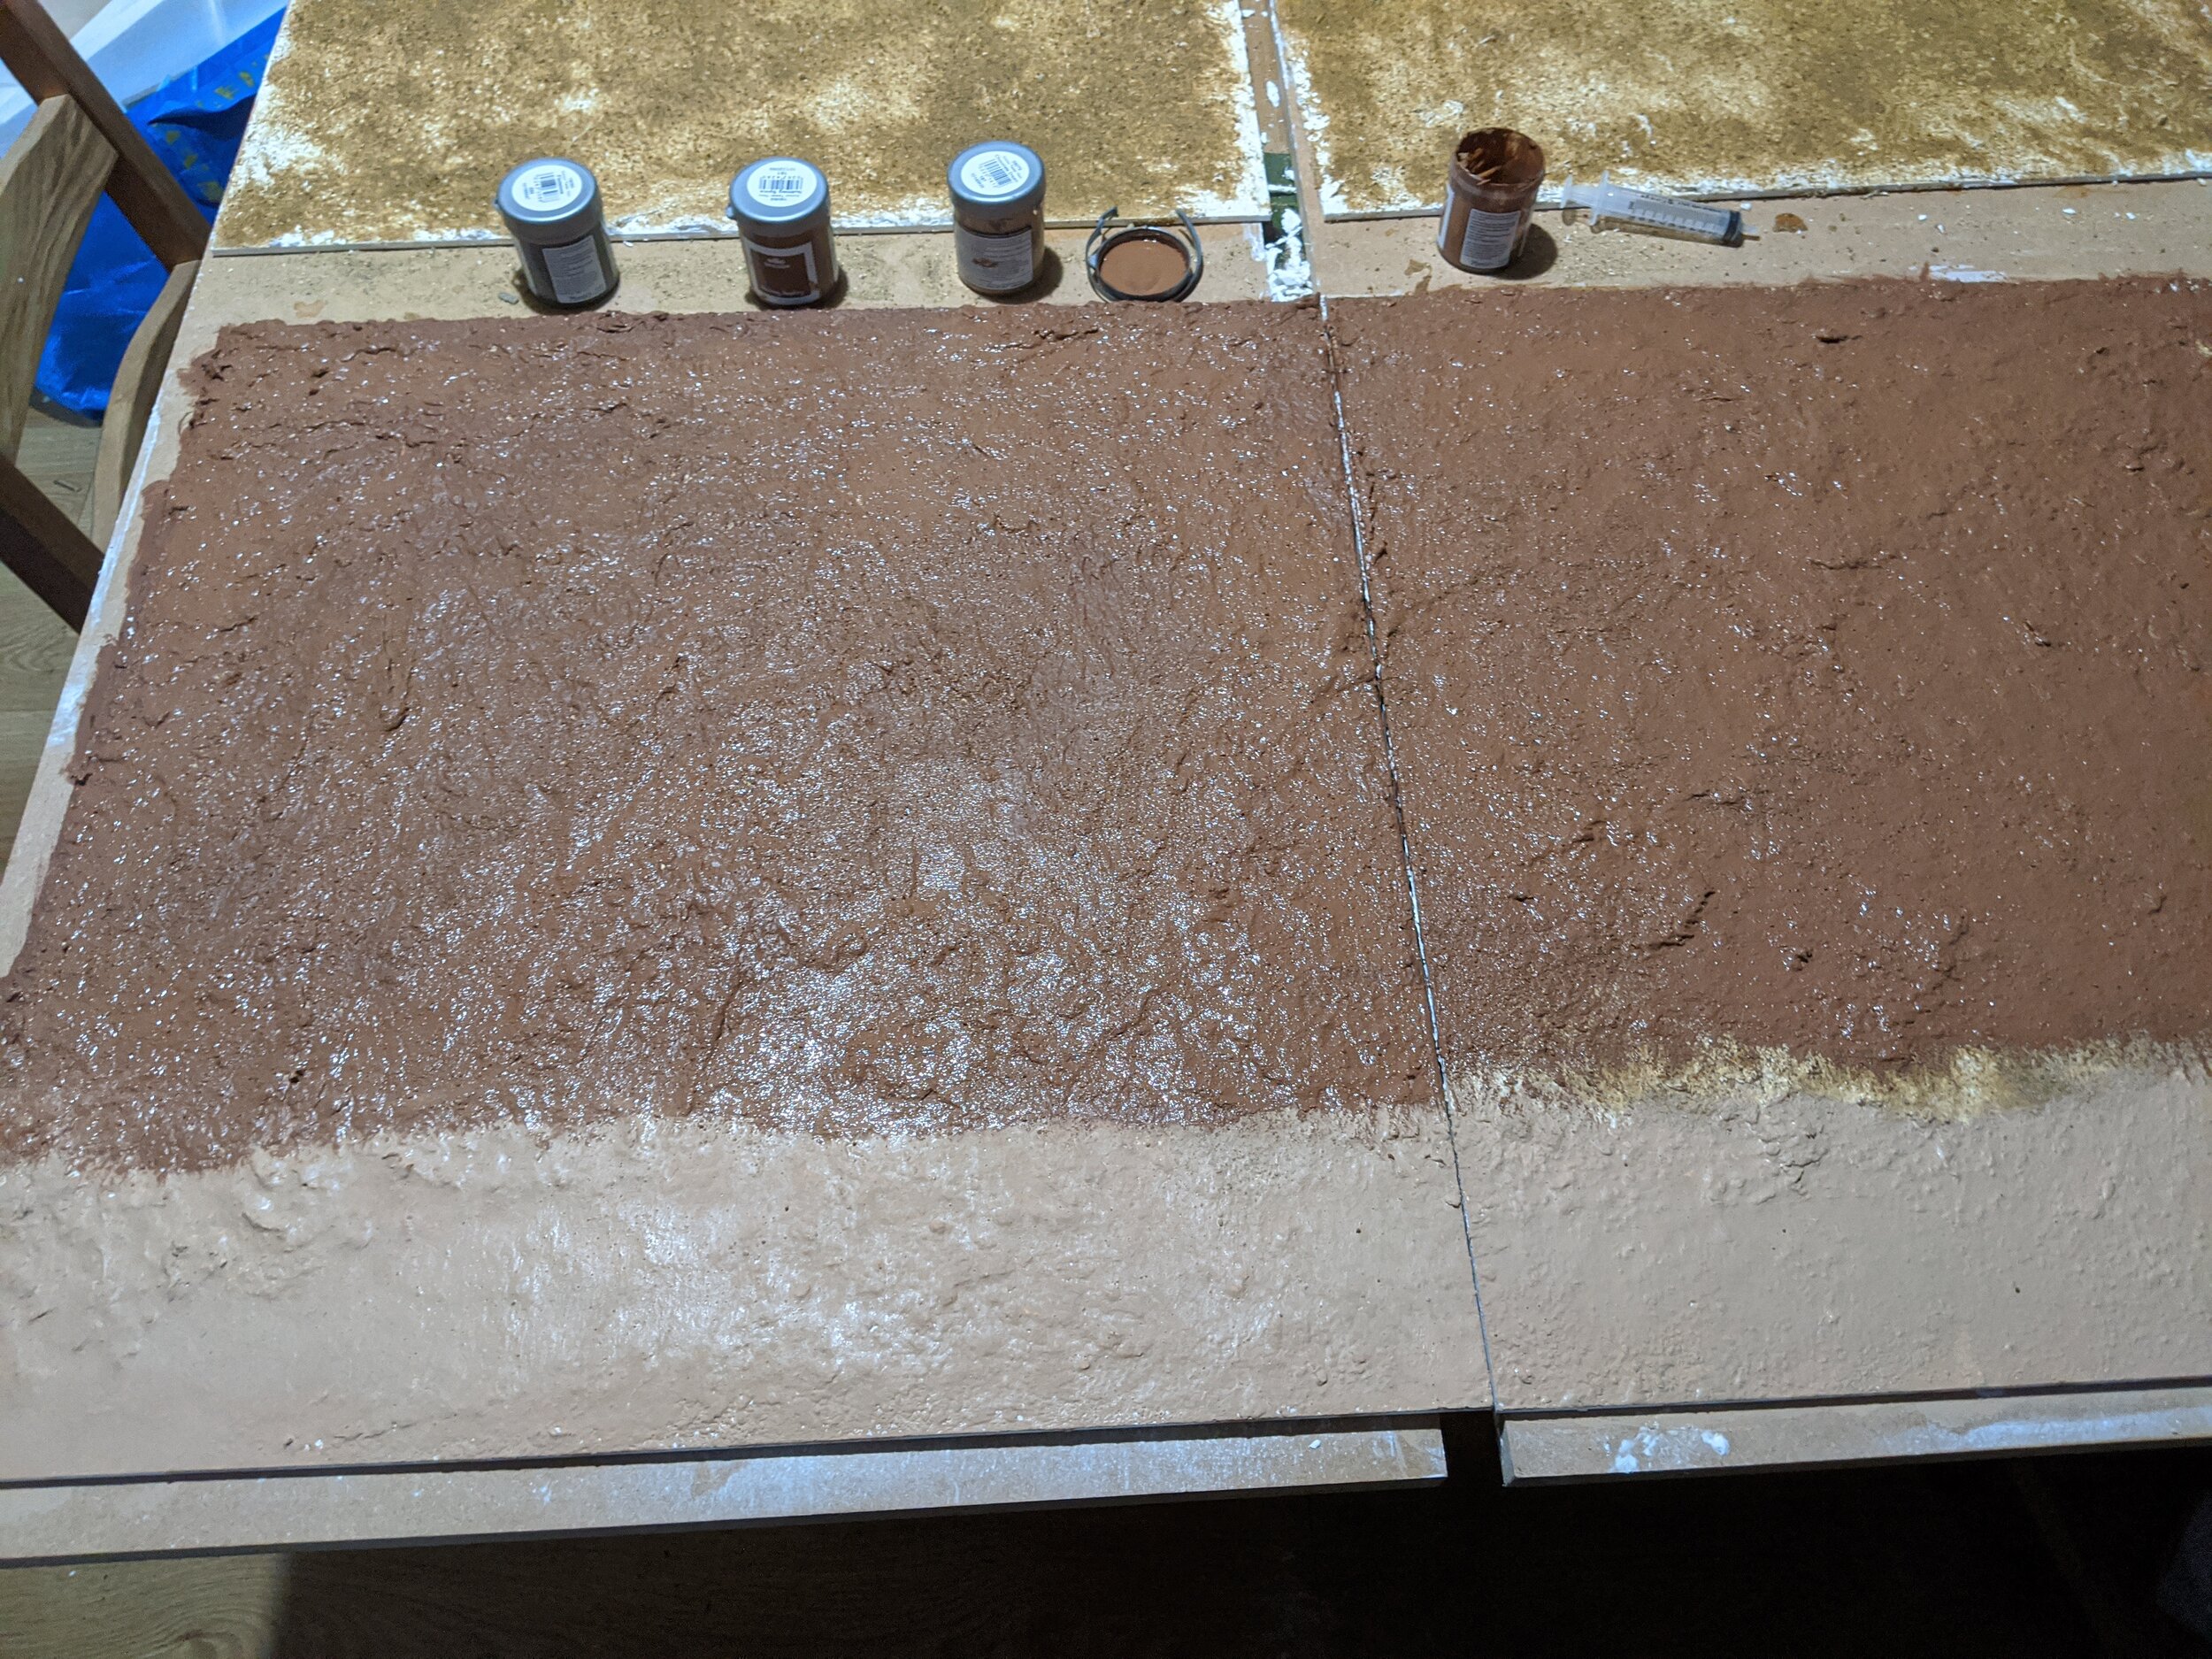
Painting comes next, and this was a bit of an ordeal. Normally, I’d use a brown paint from Wilko called Nutmeg Spice but my stockpile of it ran out after two boards. In ordinary times I’d just go out and buy more but these aren’t ordinary times and Wilko wouldn’t deliver until the following week. In the interim I experimented picking out some rockier parts with a stone-grey colour but I wasn’t the biggest fan of how this would look, mostly because I was having trouble deliniating what should be rocky vs dirt and also it was all going to get covered up with grass anyway.
#block-yui_3_17_2_1_1595110480474_16877 .sqs-gallery-block-grid .sqs-gallery-design-grid { margin-right: -20px; }
#block-yui_3_17_2_1_1595110480474_16877 .sqs-gallery-block-grid .sqs-gallery-design-grid-slide .margin-wrapper { margin-right: 20px; margin-bottom: 20px; }
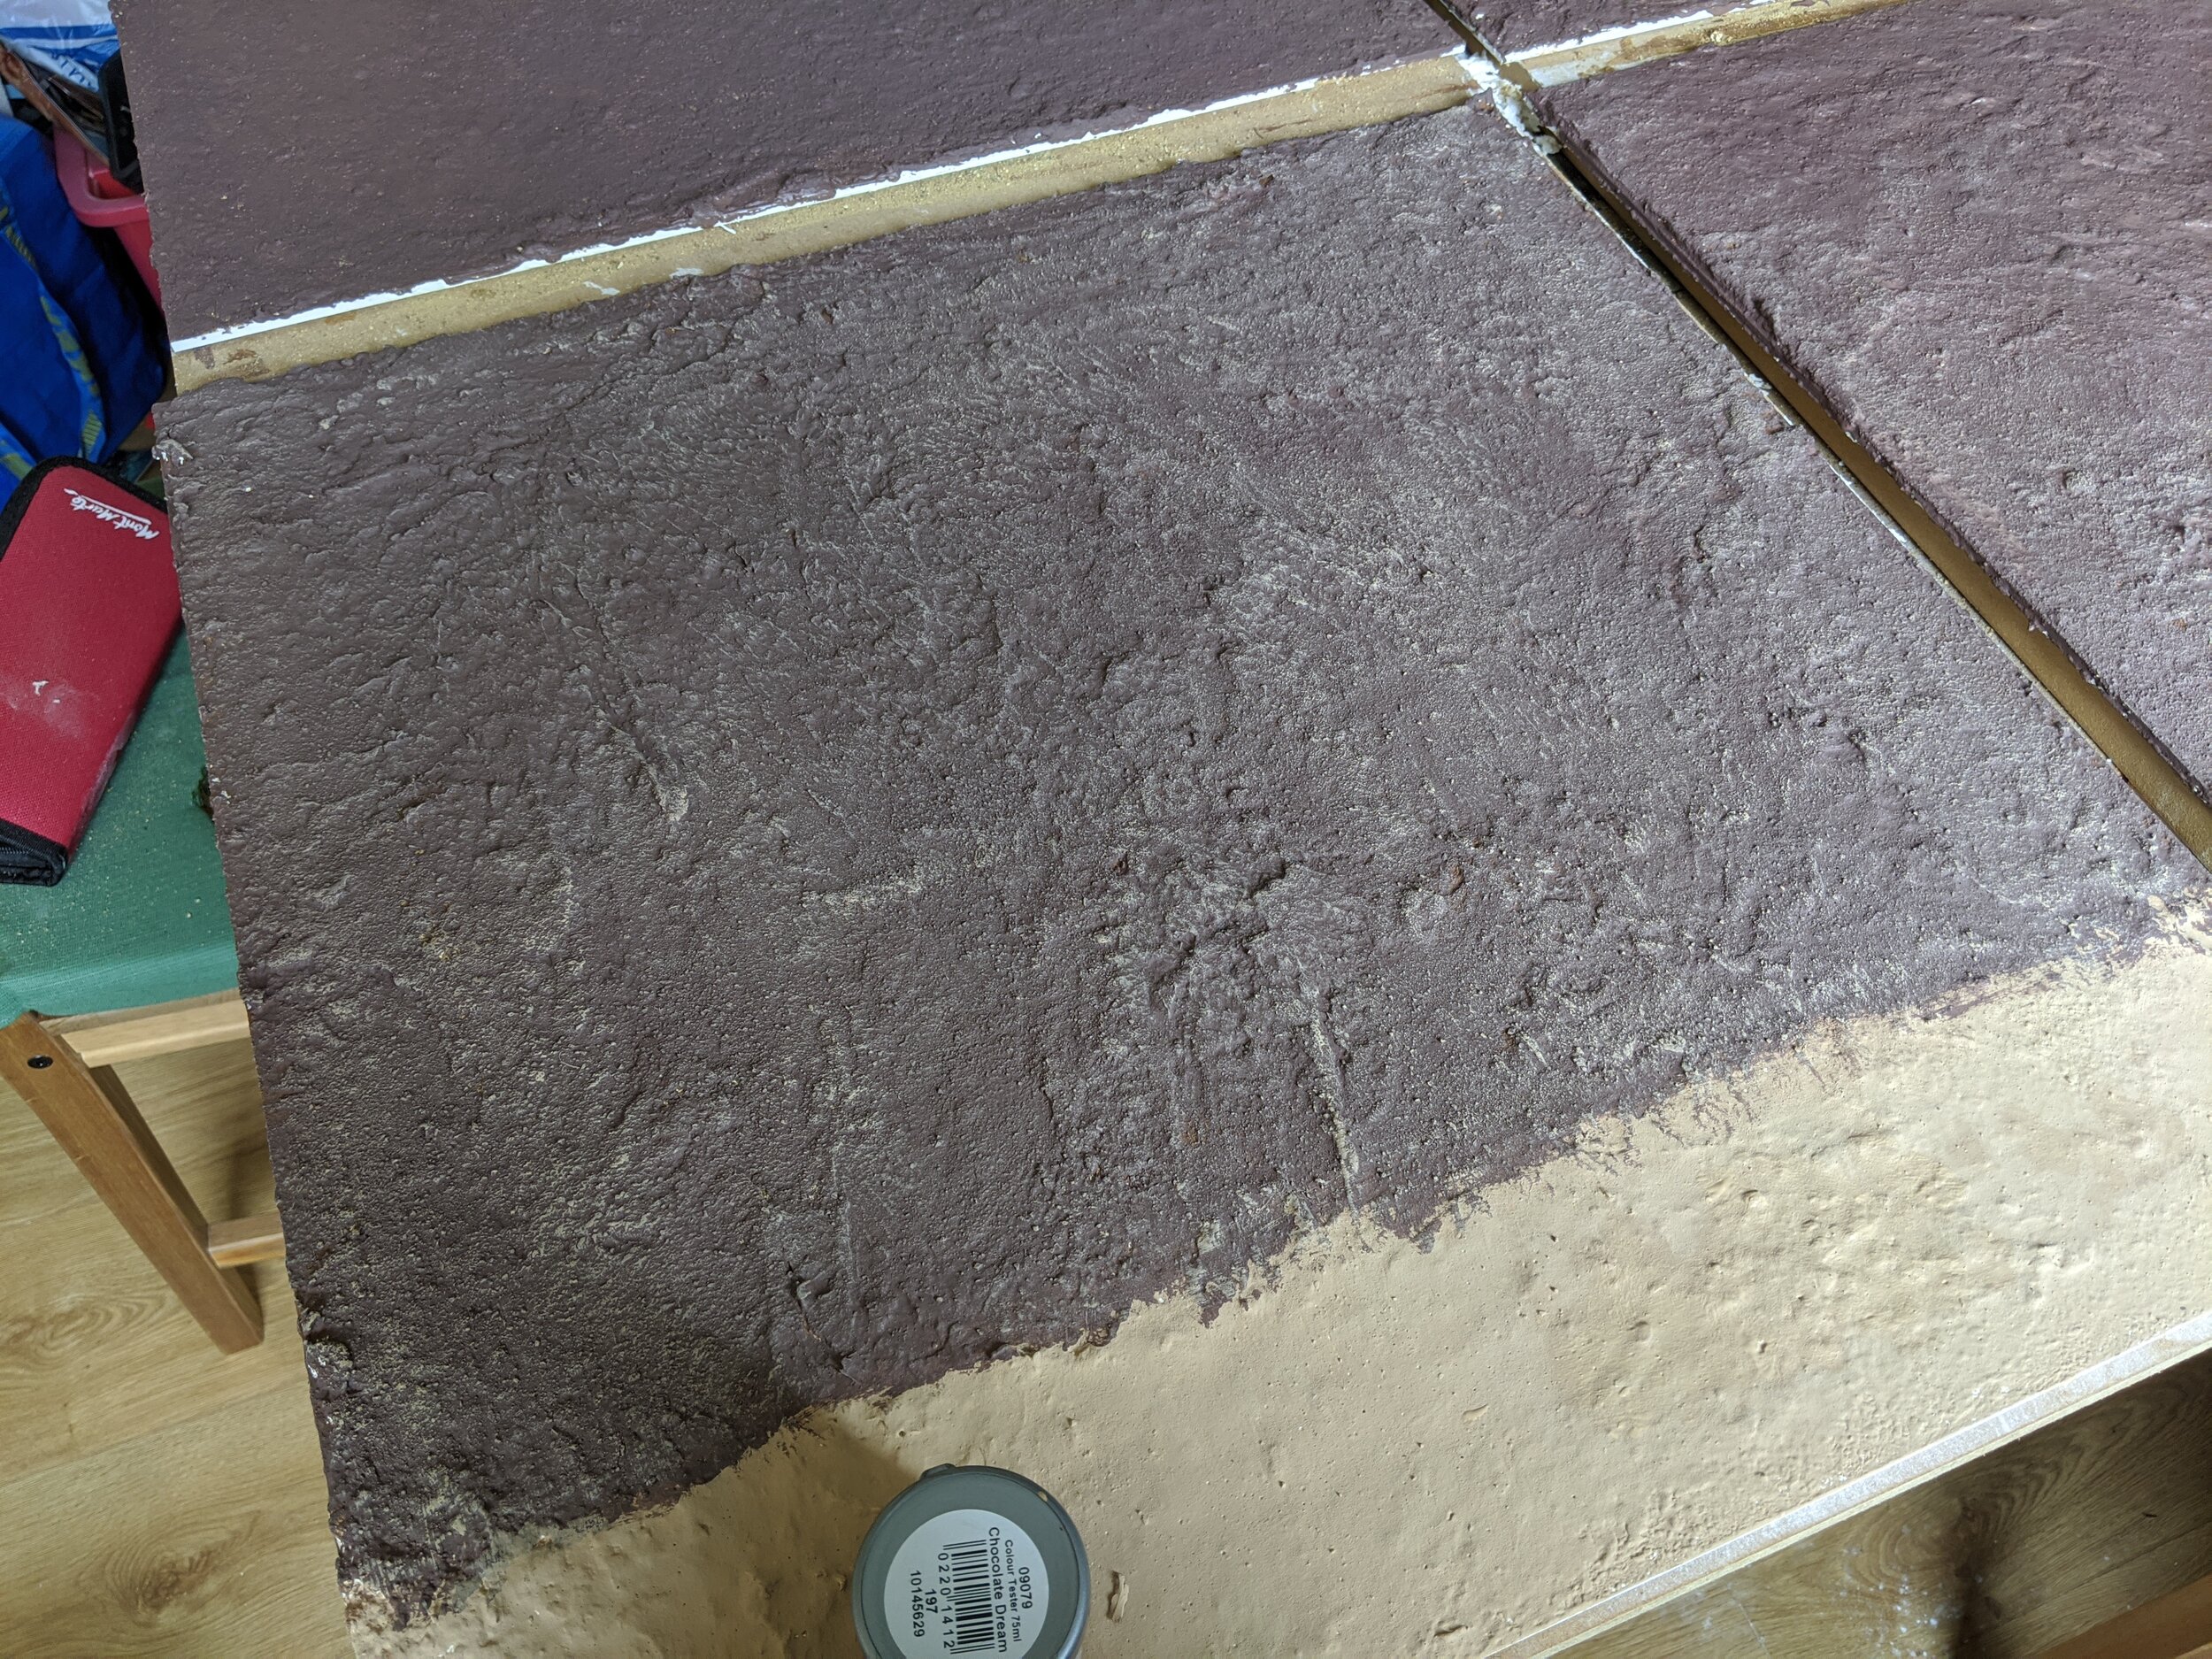
I bought what appeared to be the nearest colour from B&Q, which turned out to not be anywhere close and somehow dried purple. Purple of all colours. Even after drybrushing with a light tan colour it didn’t look like dirt, although maybe it could work for some kind of alien landscape. Colour aside, it did serve pretty well as an undercoat for the next step and should serve quite well in protecting the sculptamold and sand from abuse down the line.

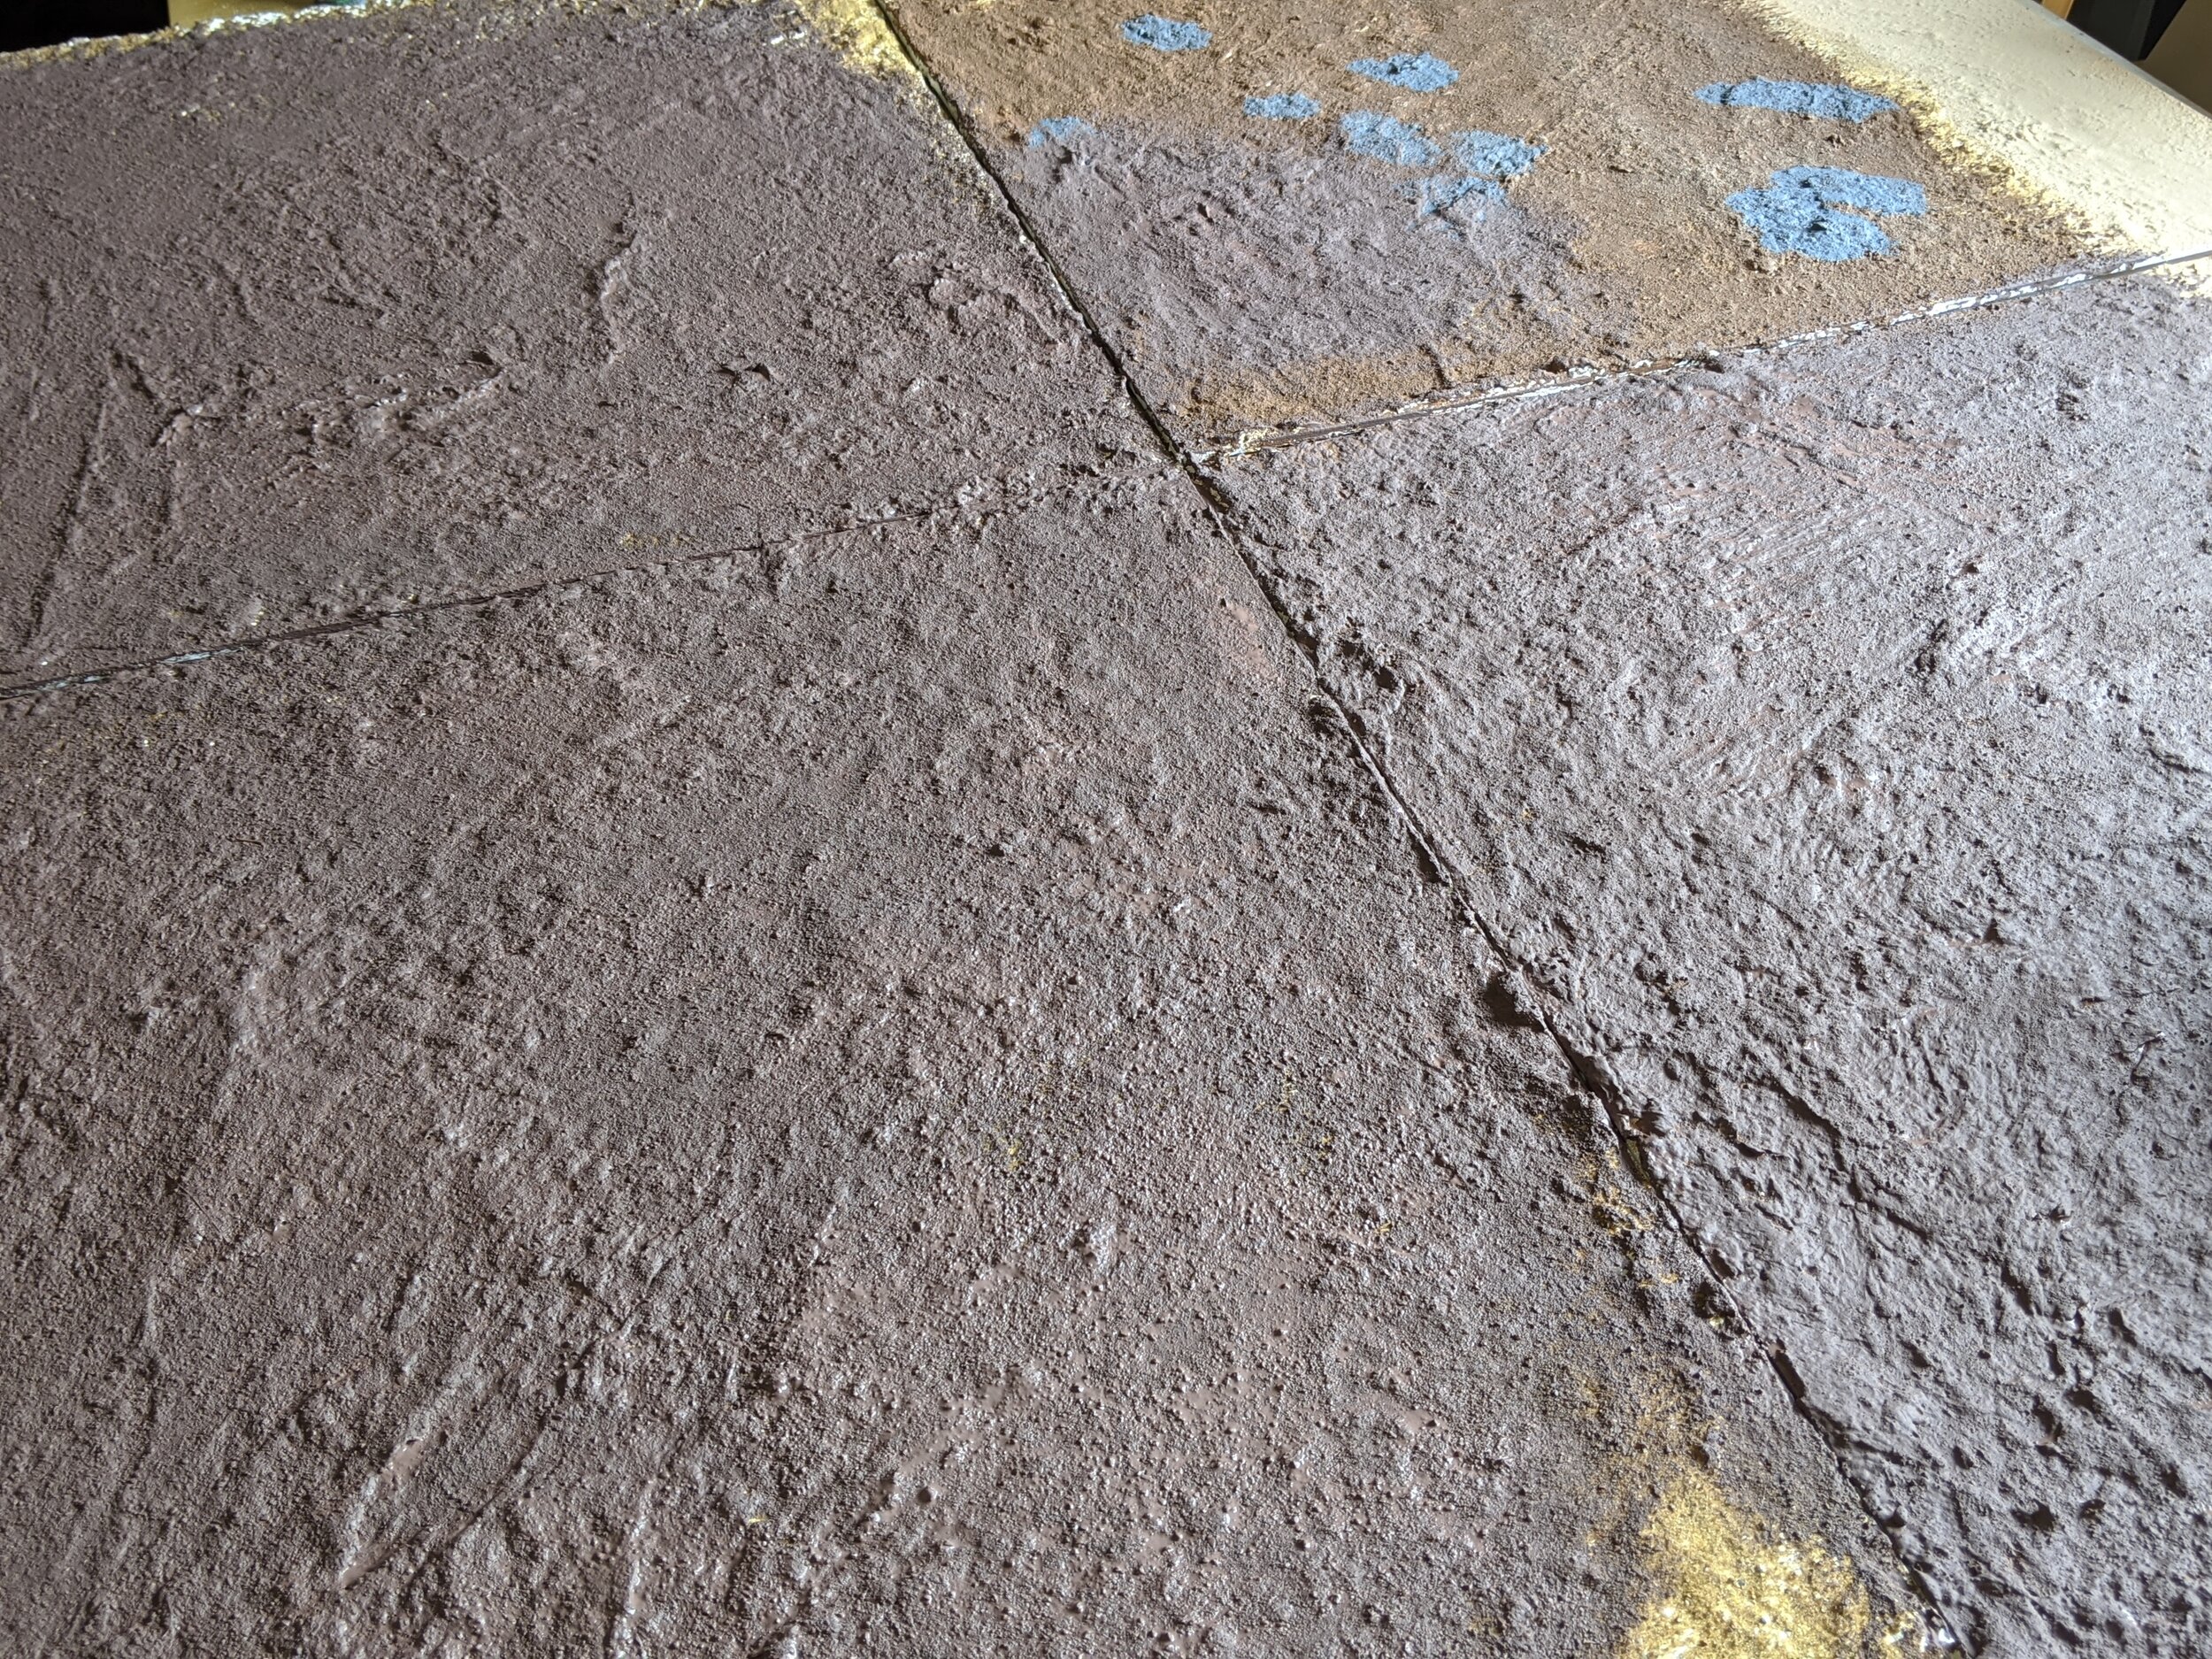
Finally I gave in and just spray painted the whole lot. I should have done this from the start frankly. It came out much better than it had any right to. I added some slight two-tone variation to break it up but I’m not sure it actually shows in the final product. It made me feel better.
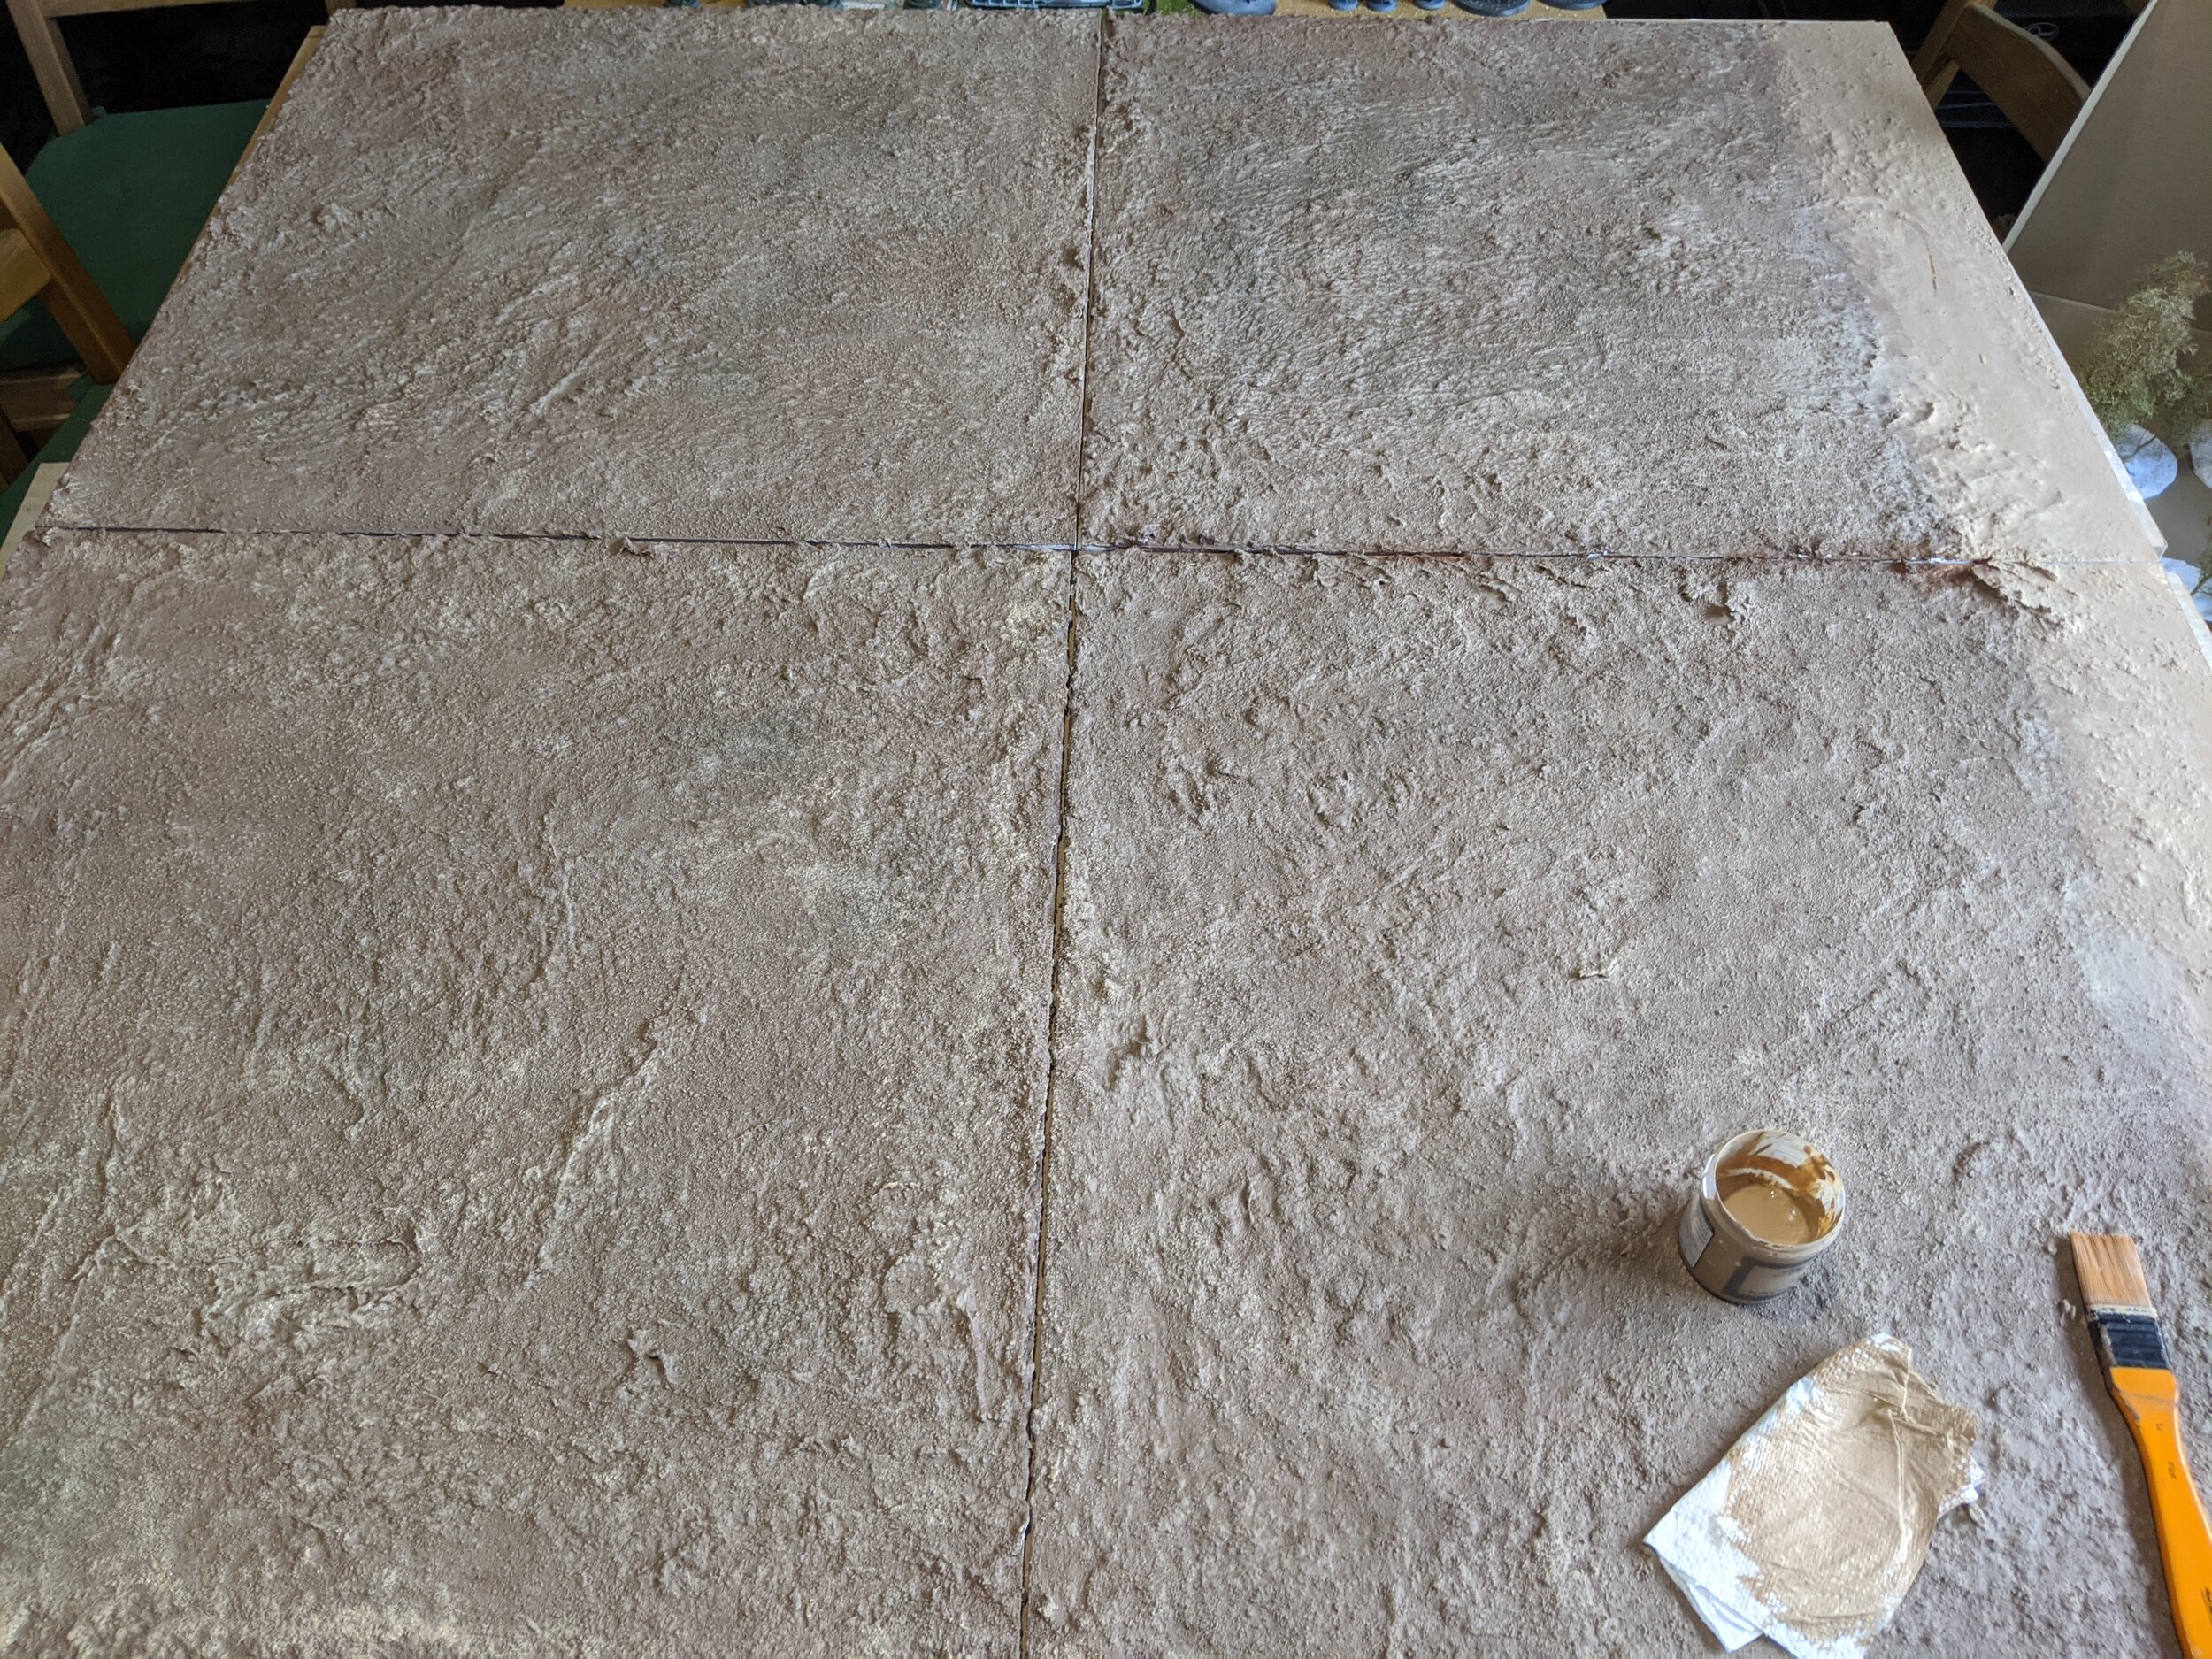
Some light drybrushing later and we’re off to the races. Bear in mind up to this point it’s taken a few evenings and lunch breaks, most of the time has been spent waiting for stuff to dry. You could, for some applications, just stop here. With different colour choices this would make a very passable desert or volcanic plains board.
#block-yui_3_17_2_1_1595110480474_24202 .sqs-gallery-block-grid .sqs-gallery-design-grid { margin-right: -20px; }
#block-yui_3_17_2_1_1595110480474_24202 .sqs-gallery-block-grid .sqs-gallery-design-grid-slide .margin-wrapper { margin-right: 20px; margin-bottom: 20px; }
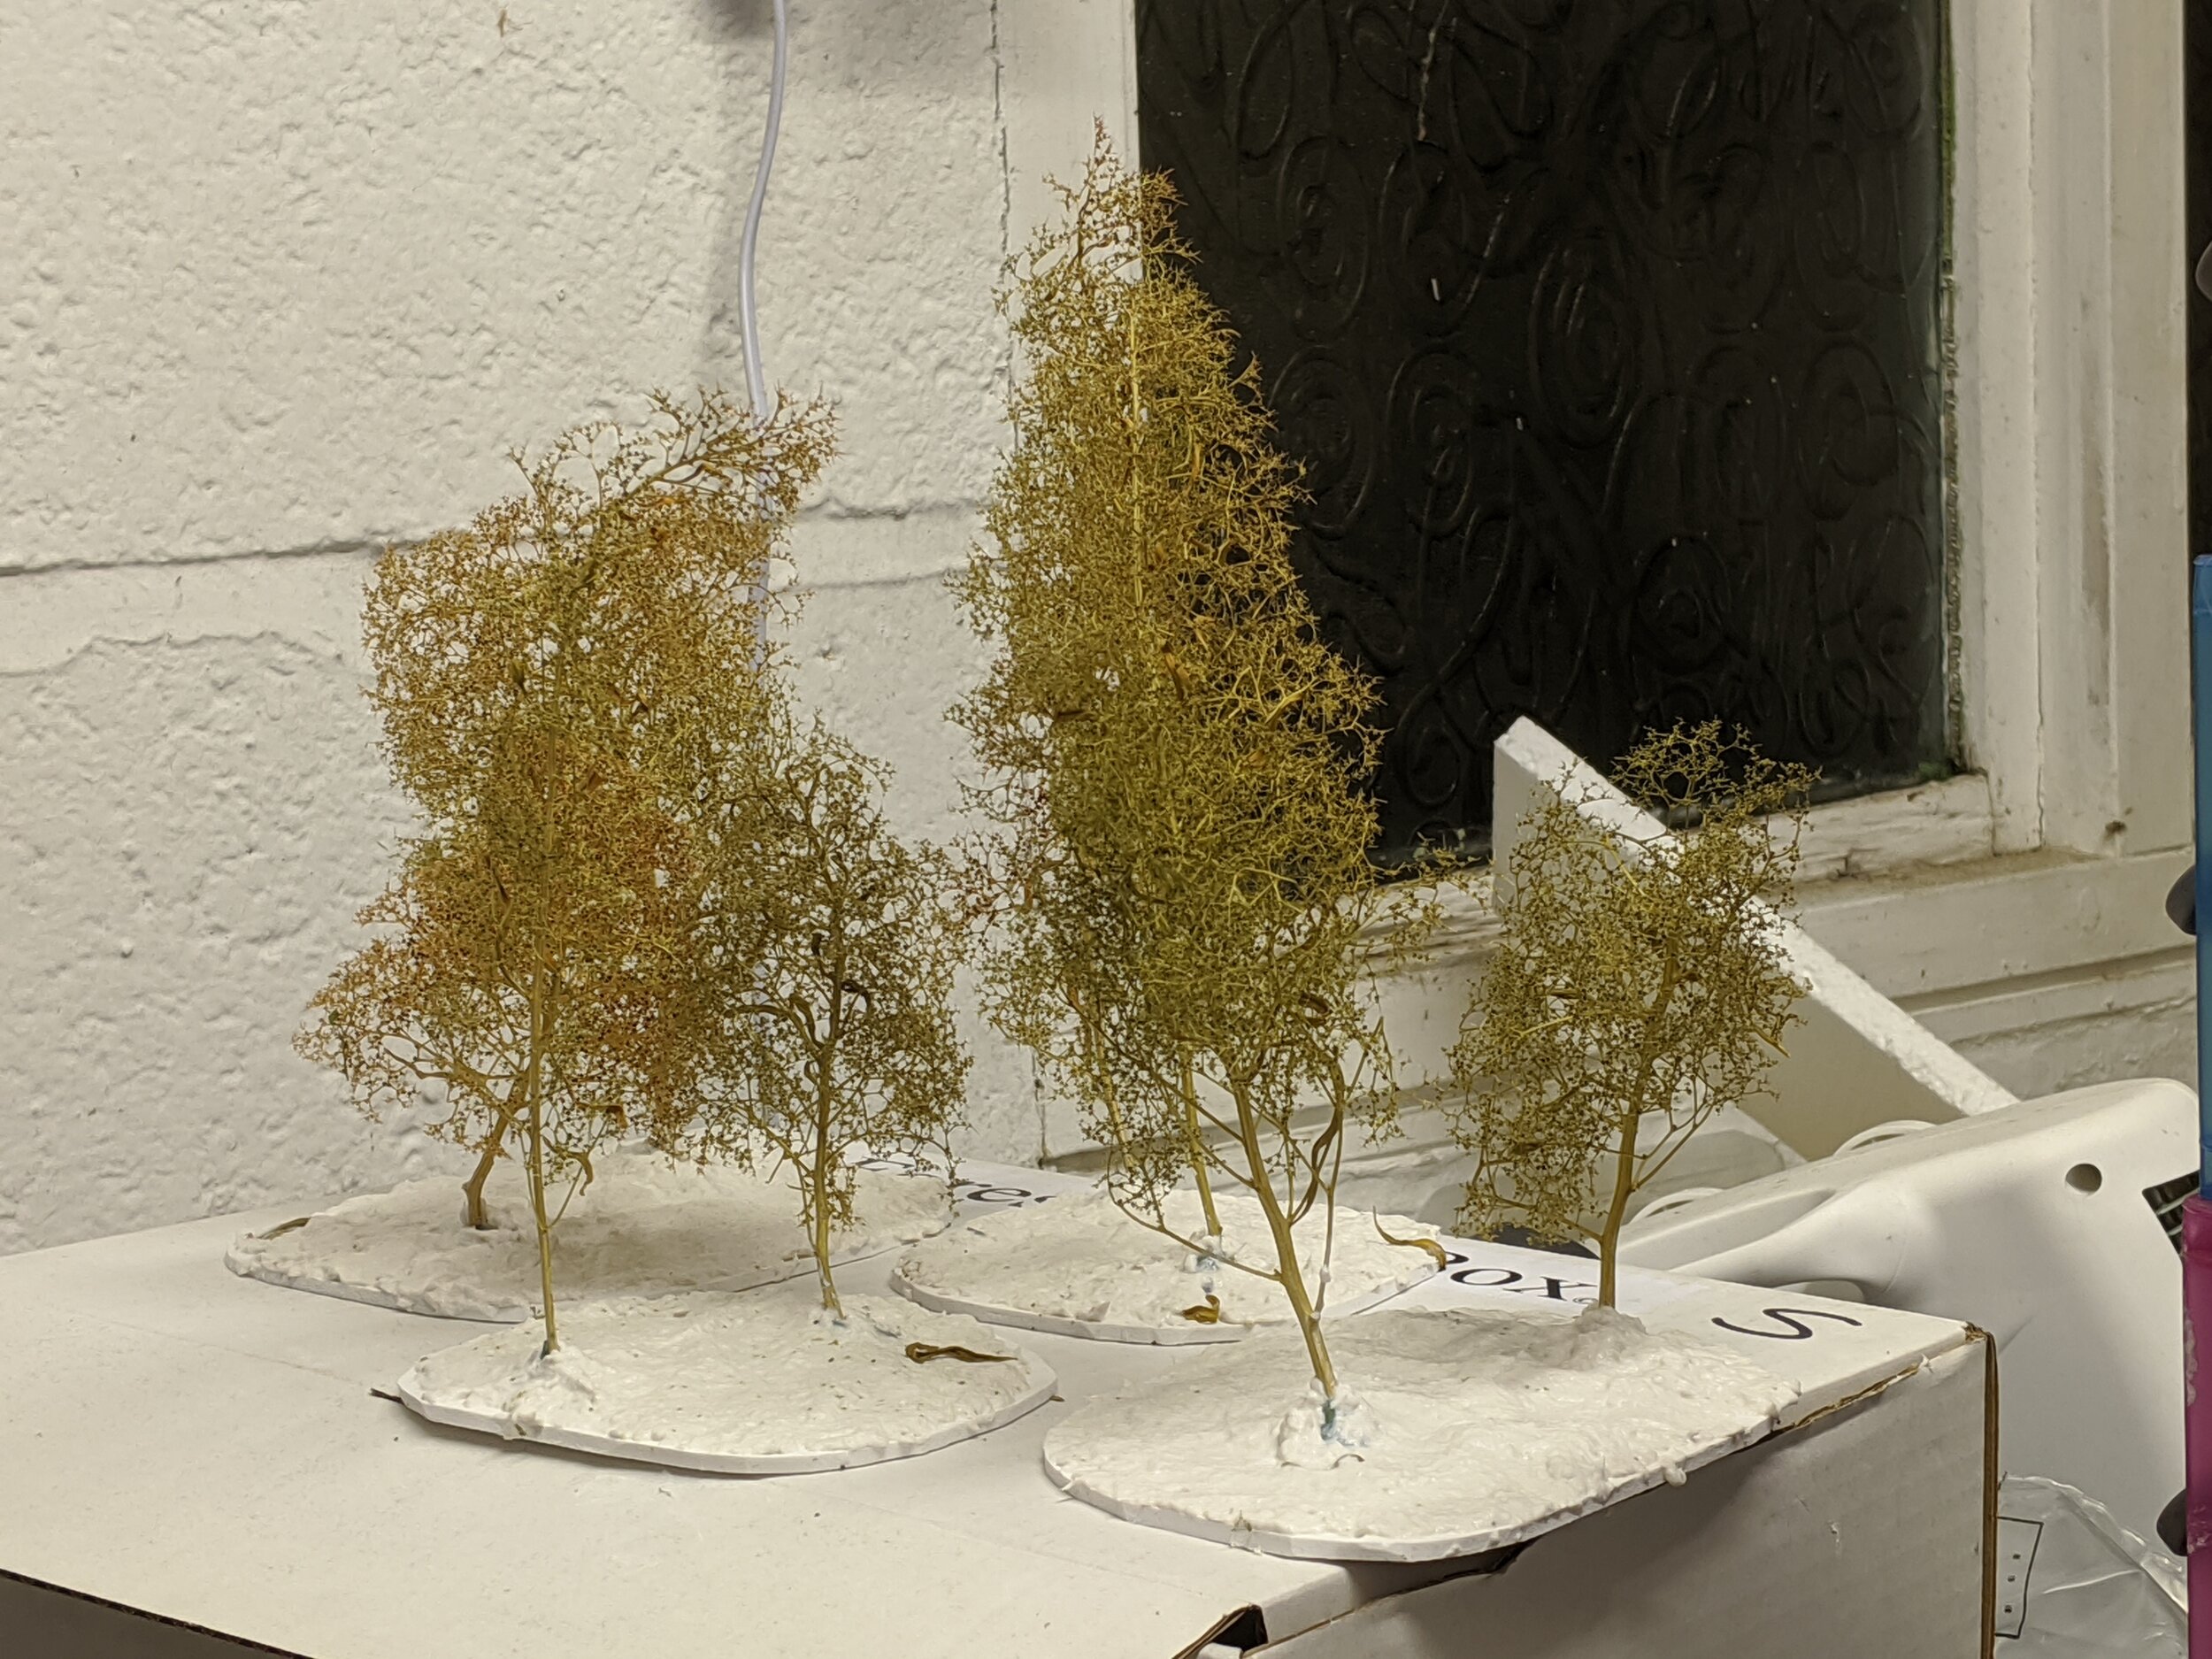
In the interim, I’d also been working on some trees to go on the board. Whilst I’d mostly finished a set of viking/nordic inspired buildings pre-lockdown I don’t actually own any model trees. I do however own a shitton of seafoam I’ve been telling myself I’m going to turn into trees for several years. So I quickly attached them to some foamex bases, sculptamolded the botto, added sand and sraypainted the lot with the same colours I used on the boards and then set them aside to dry whilst I got my flocking setup done.
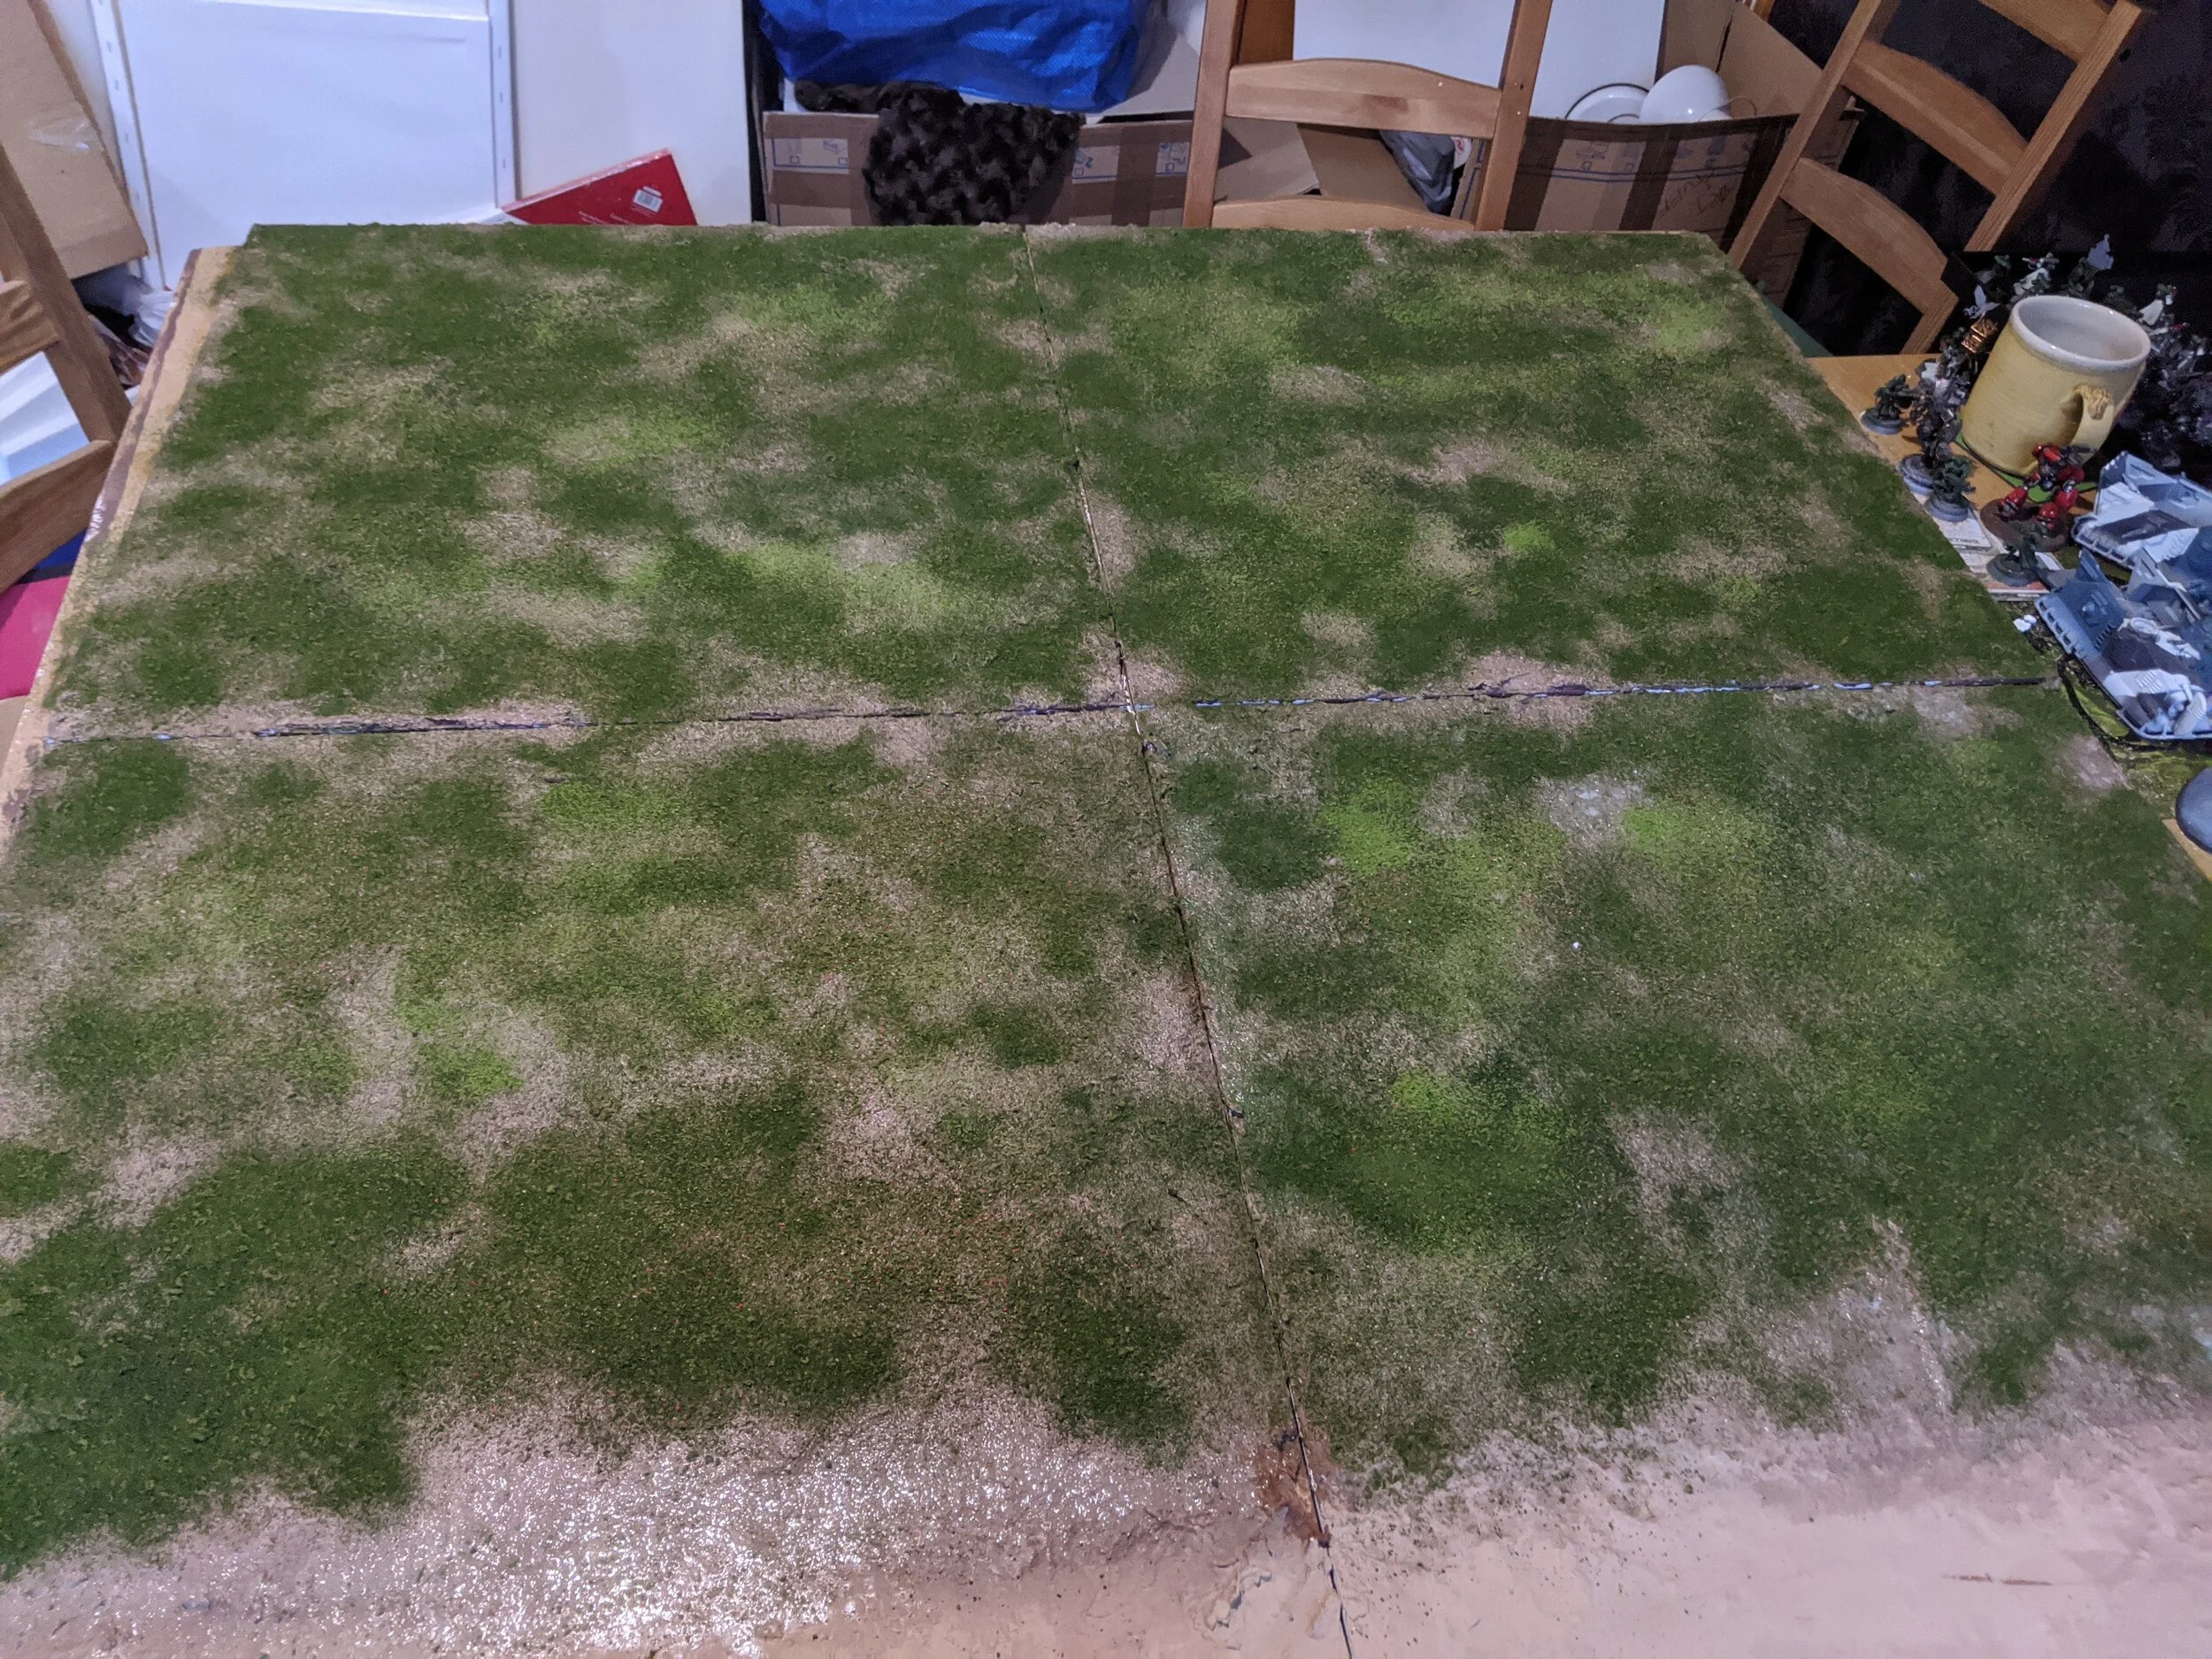
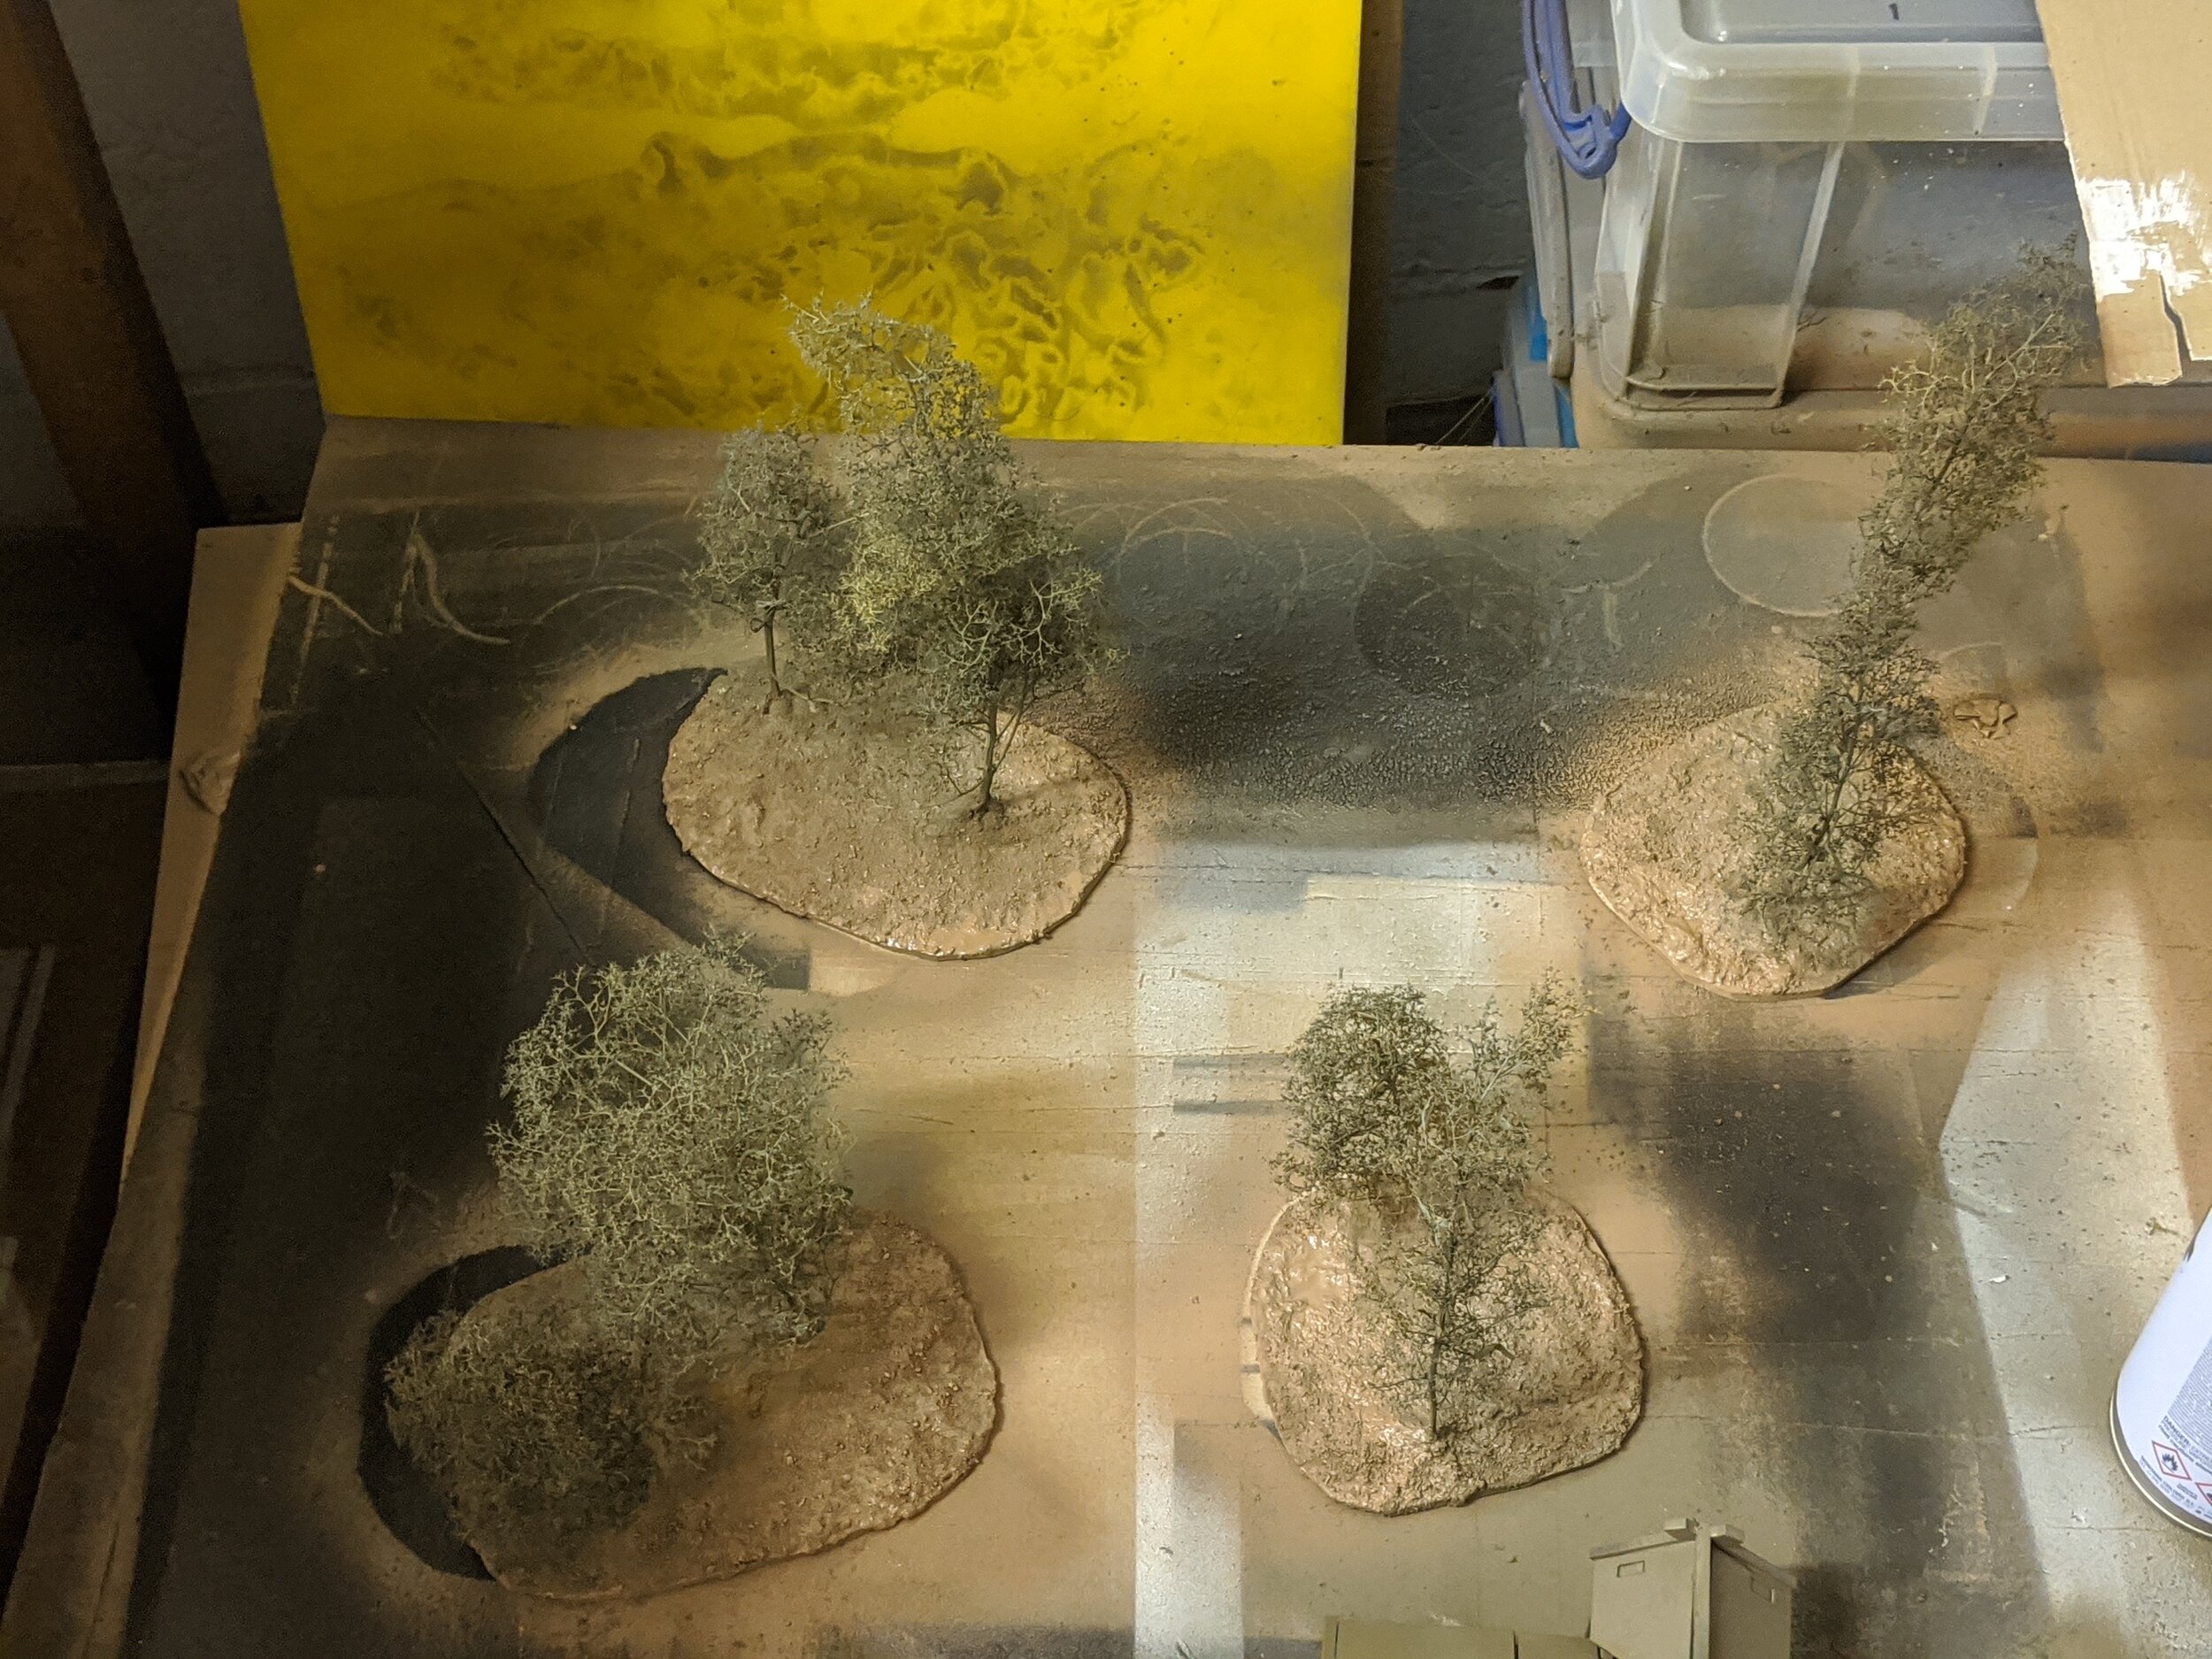
Flocking was up next. I use a mixture of shades of green, a light and dark for highlights and shading and a midtone mixed with some more yellow flock for the bulk of the work. It get scattered in a mostly hodgepodge way across the board and fixed in place the same way as the sand. A first coat of lightly watered down PVA and a sealing coat of heavily thinned PVA with some alcohol for wetting.
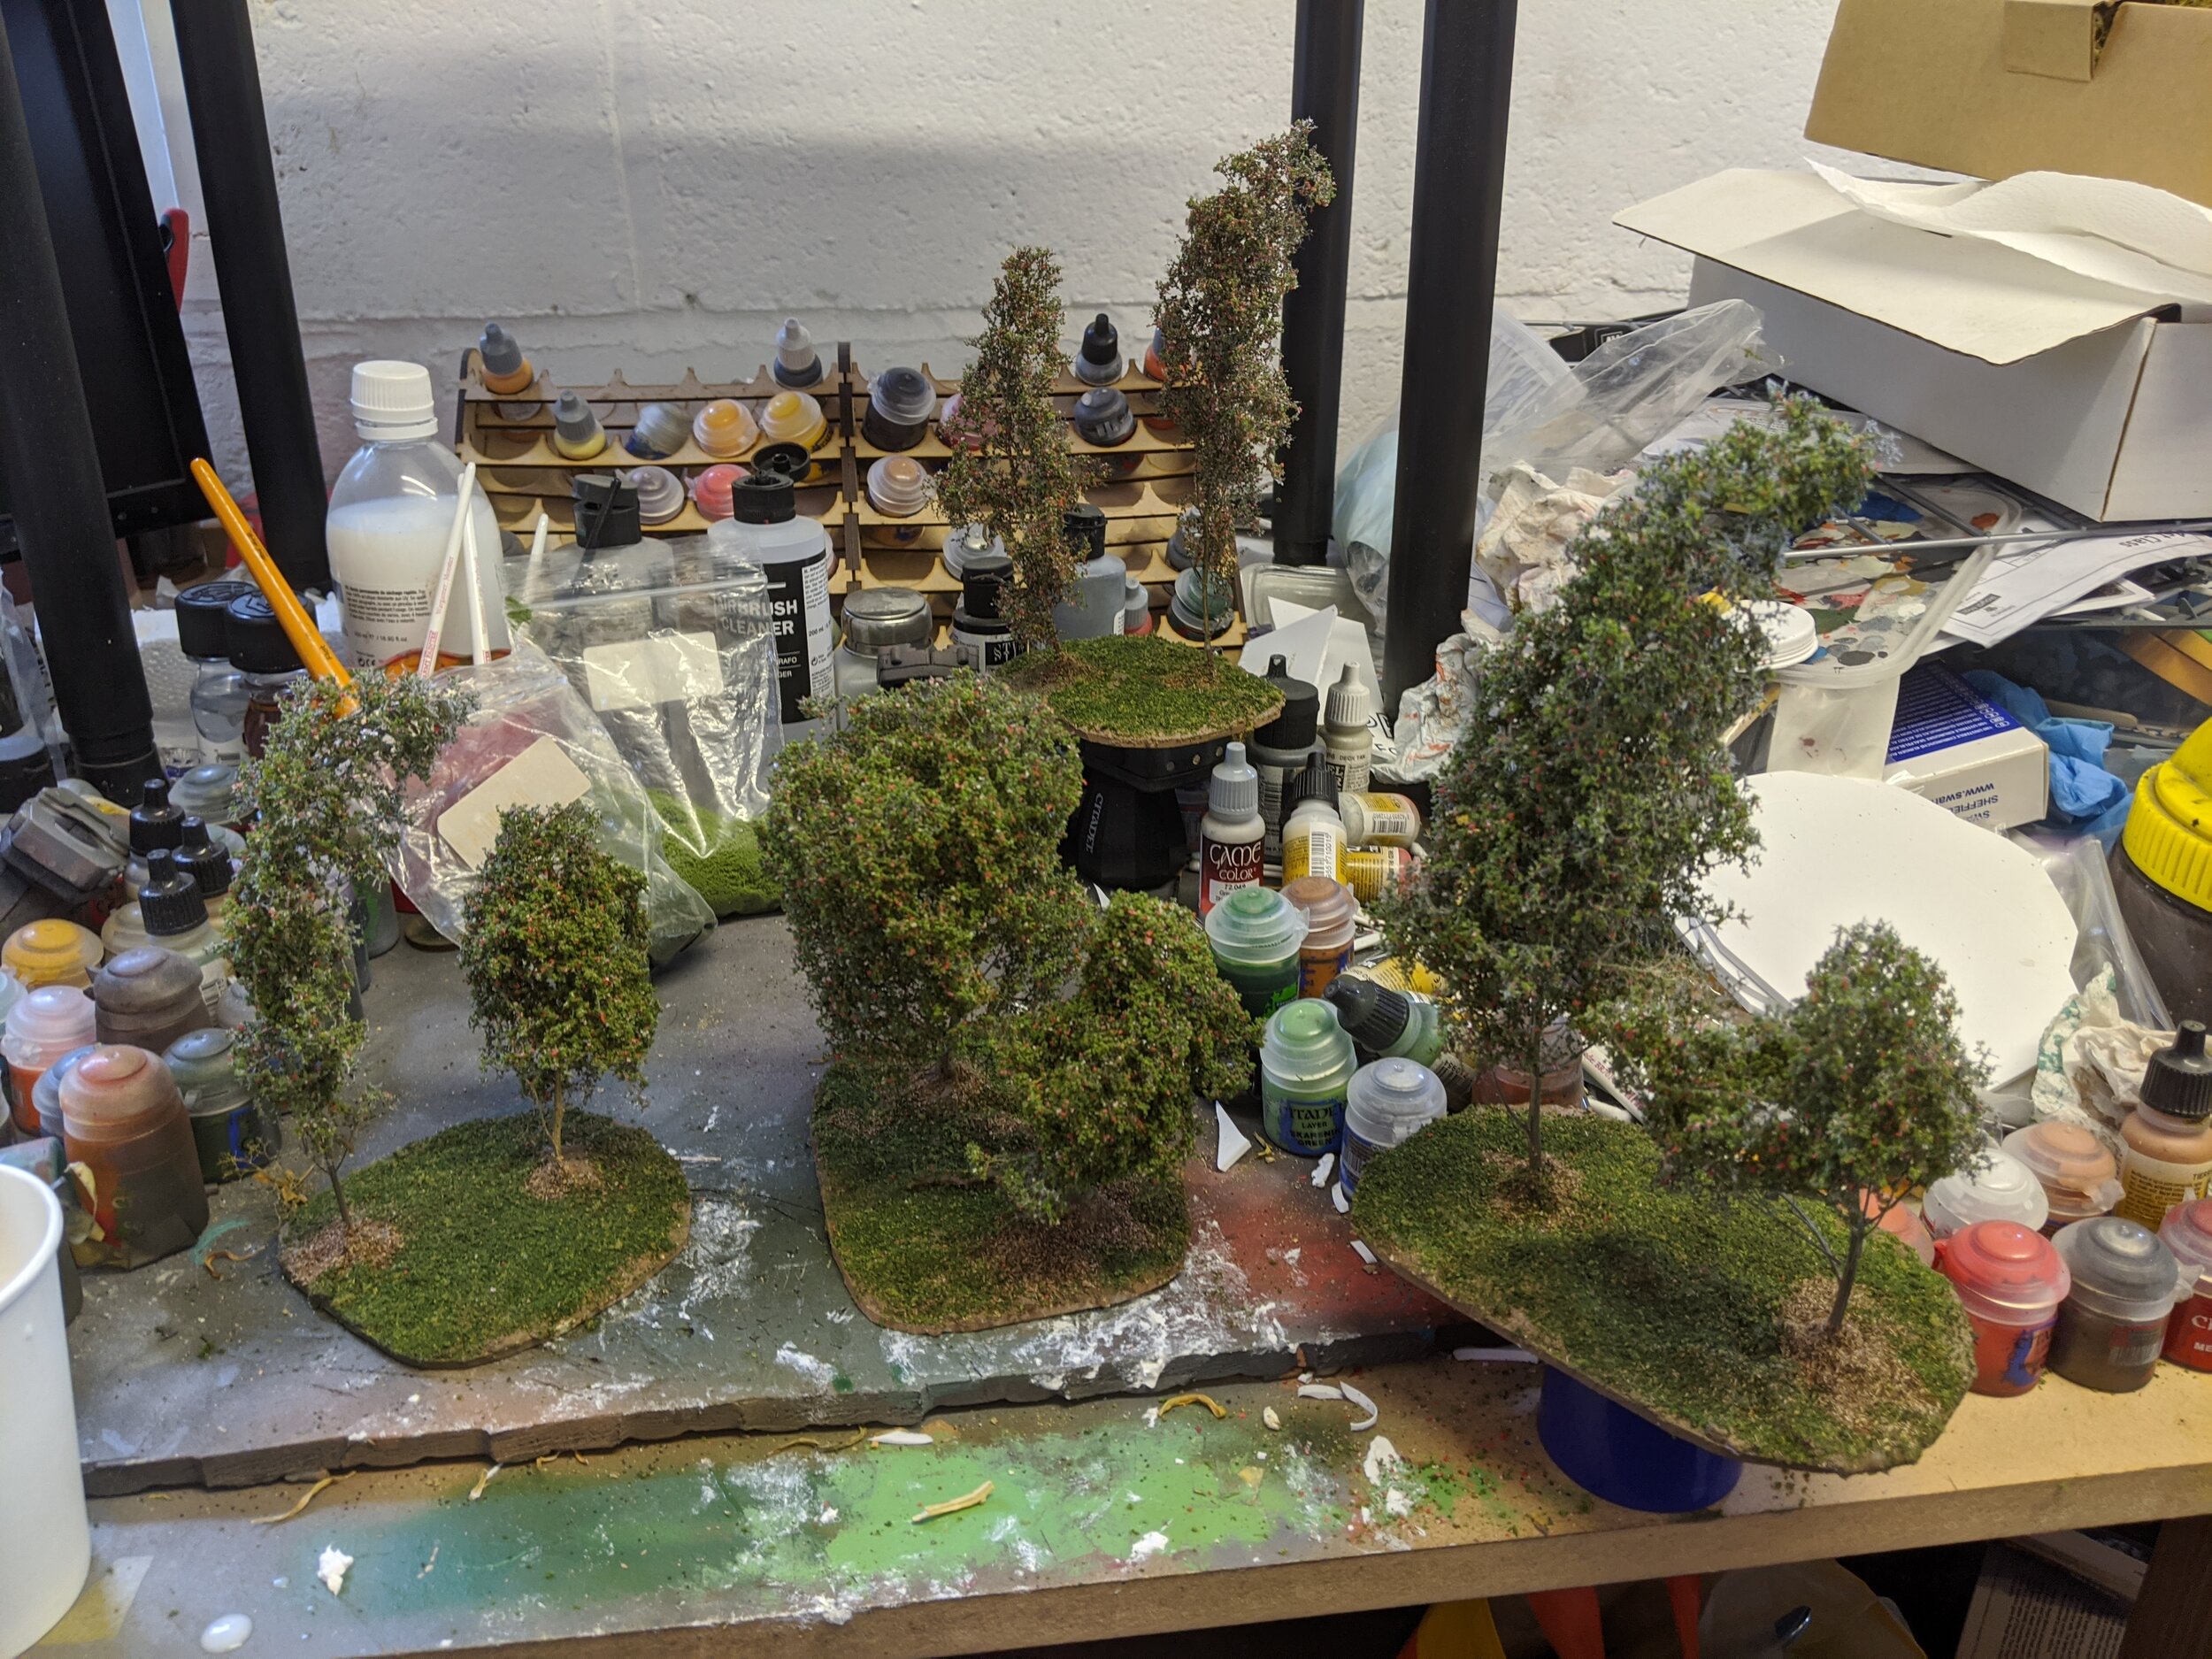
The base of the trees got the same story, although a leaf litter texture was applied directly underneath the trees, and a flock with little red and pink bits was applied with spray glue to the seafoam branches to make the tree canopy. This looks better than it has any right to, and I intend to do a video when I do my next batch to show just how easy it is. I do need to buy more flock though.
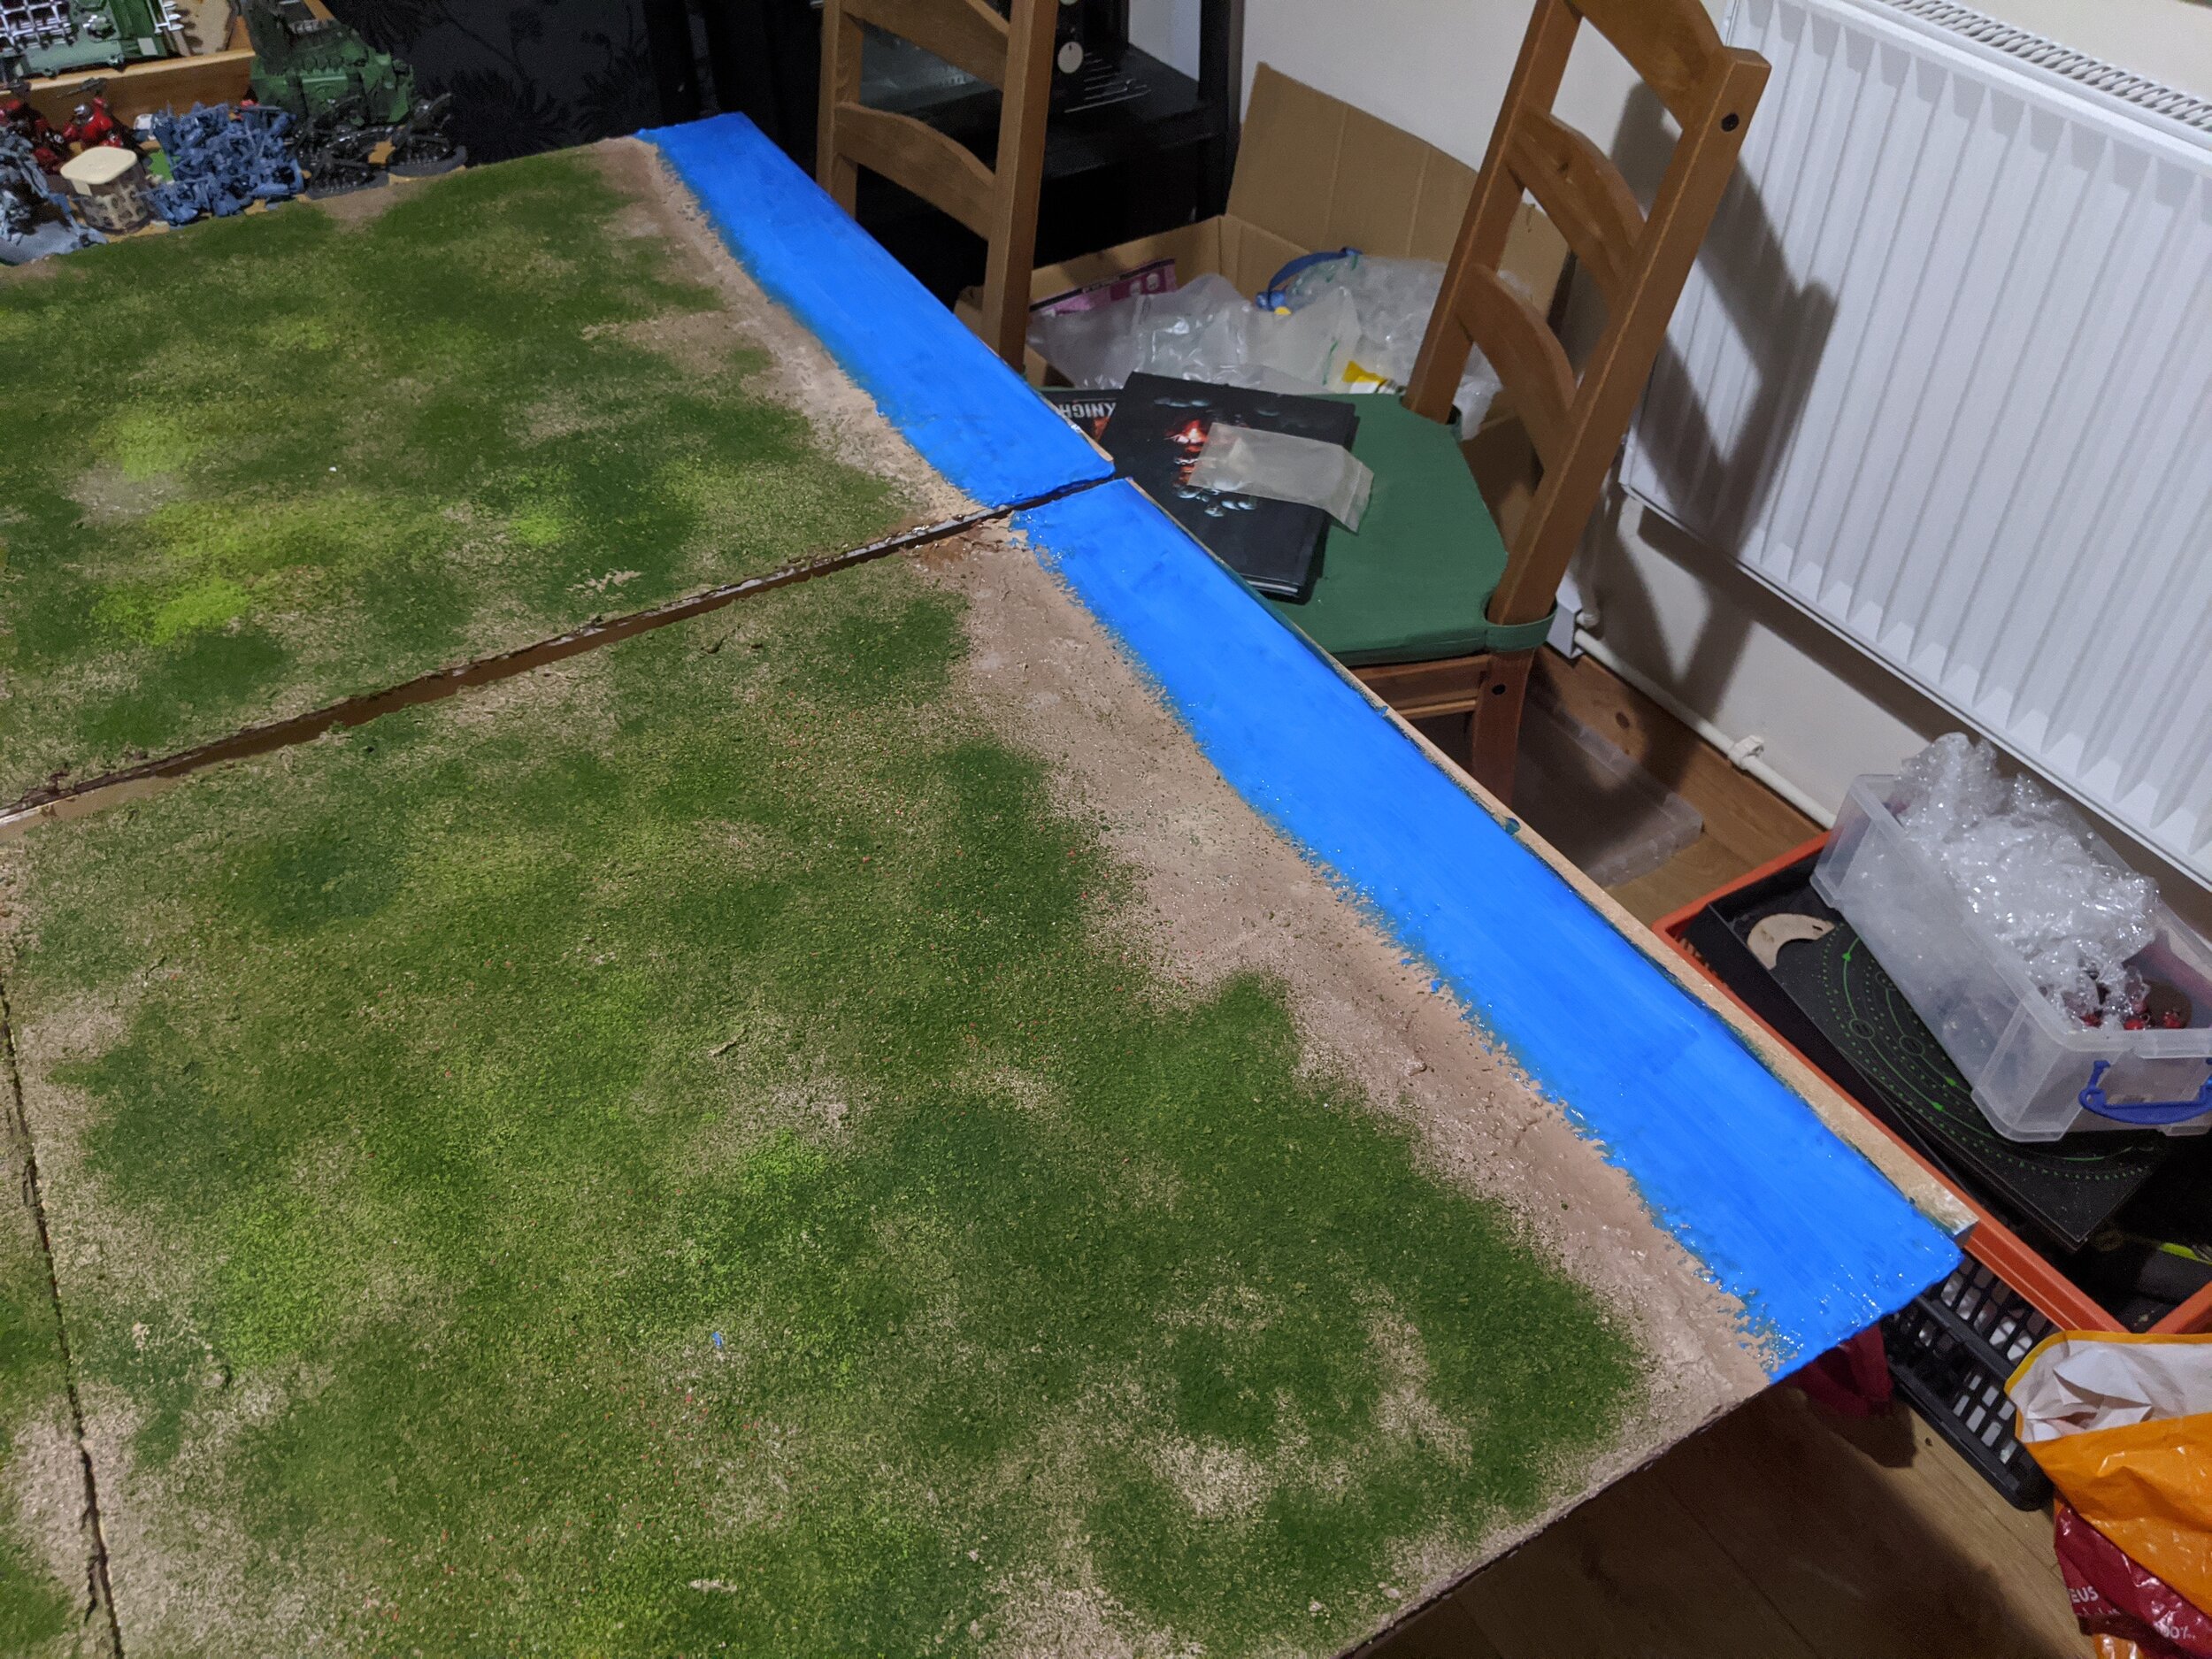
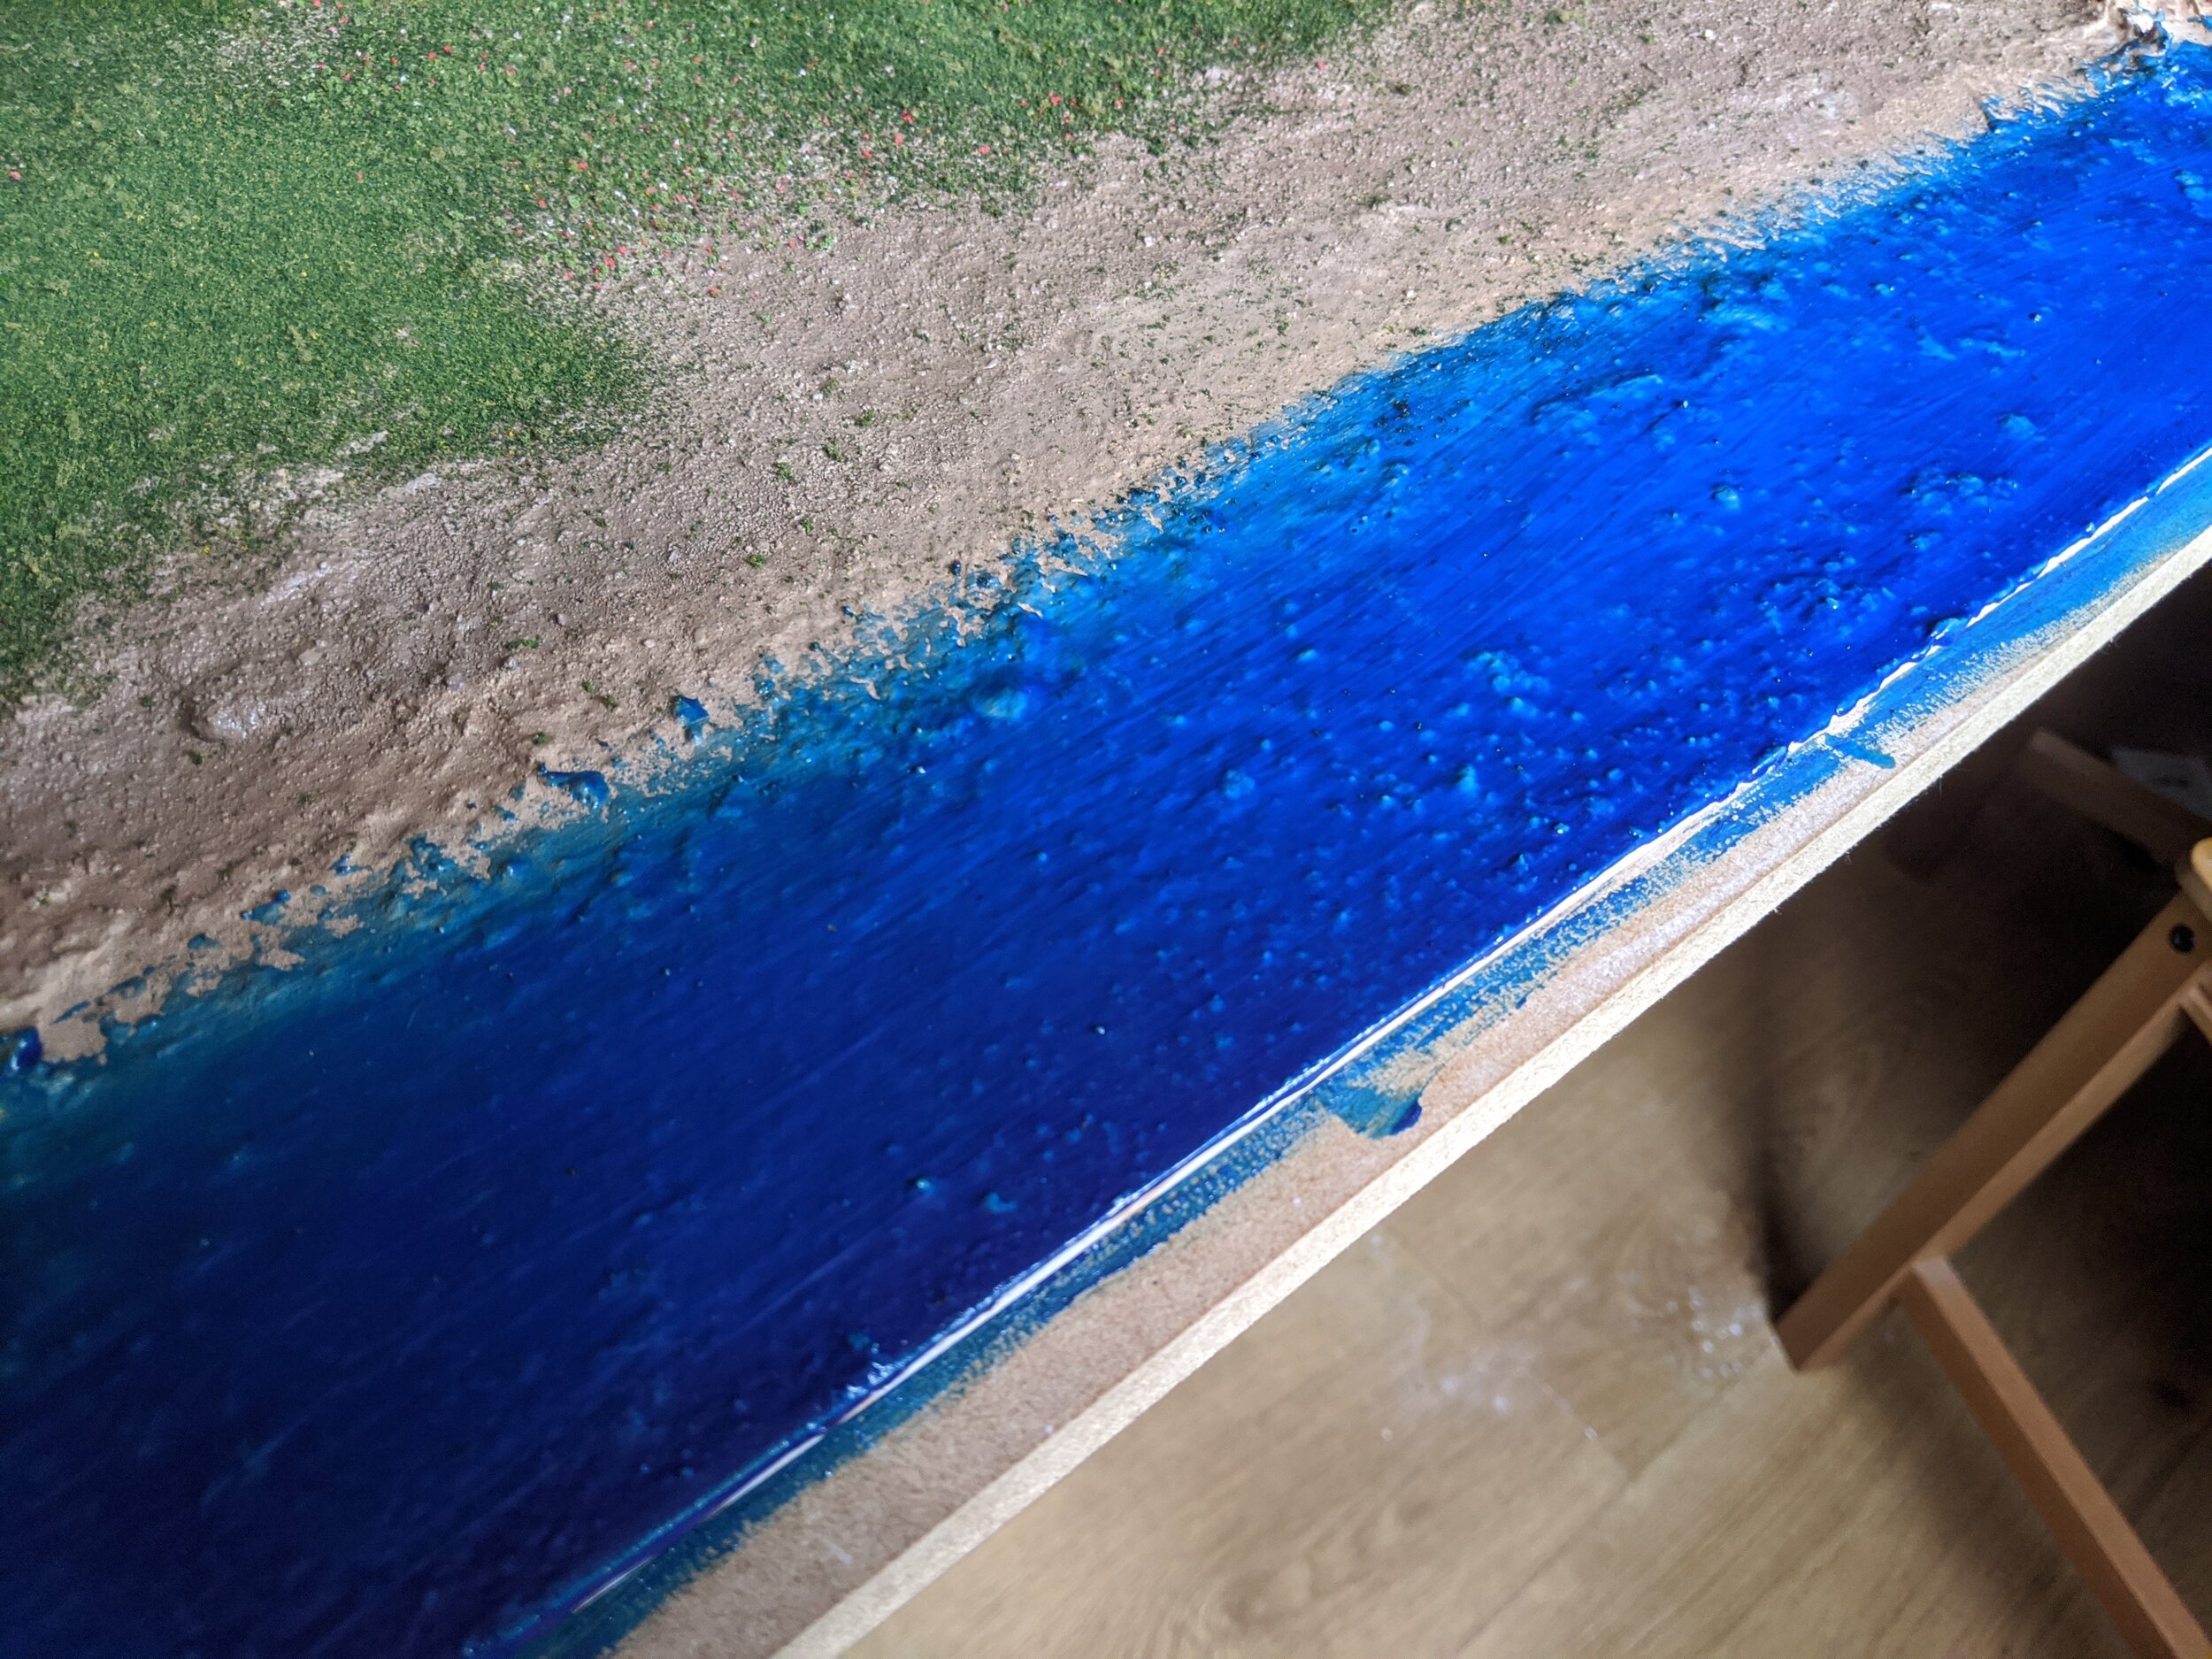
The final part was the waterfront. I mixed transparent blue paint with gloss gel medium, and painted the water’s edge and then mixed increasing amounts of gel medium into the mix to paint additional layers as each one dried enough to overcoat. It would take overnight for it to dry clear and I wouldn’t know how it was going to turn out until it dried completely.
#block-yui_3_17_2_1_1595110480474_35048 .sqs-gallery-block-grid .sqs-gallery-design-grid { margin-right: -20px; }
#block-yui_3_17_2_1_1595110480474_35048 .sqs-gallery-block-grid .sqs-gallery-design-grid-slide .margin-wrapper { margin-right: 20px; margin-bottom: 20px; }
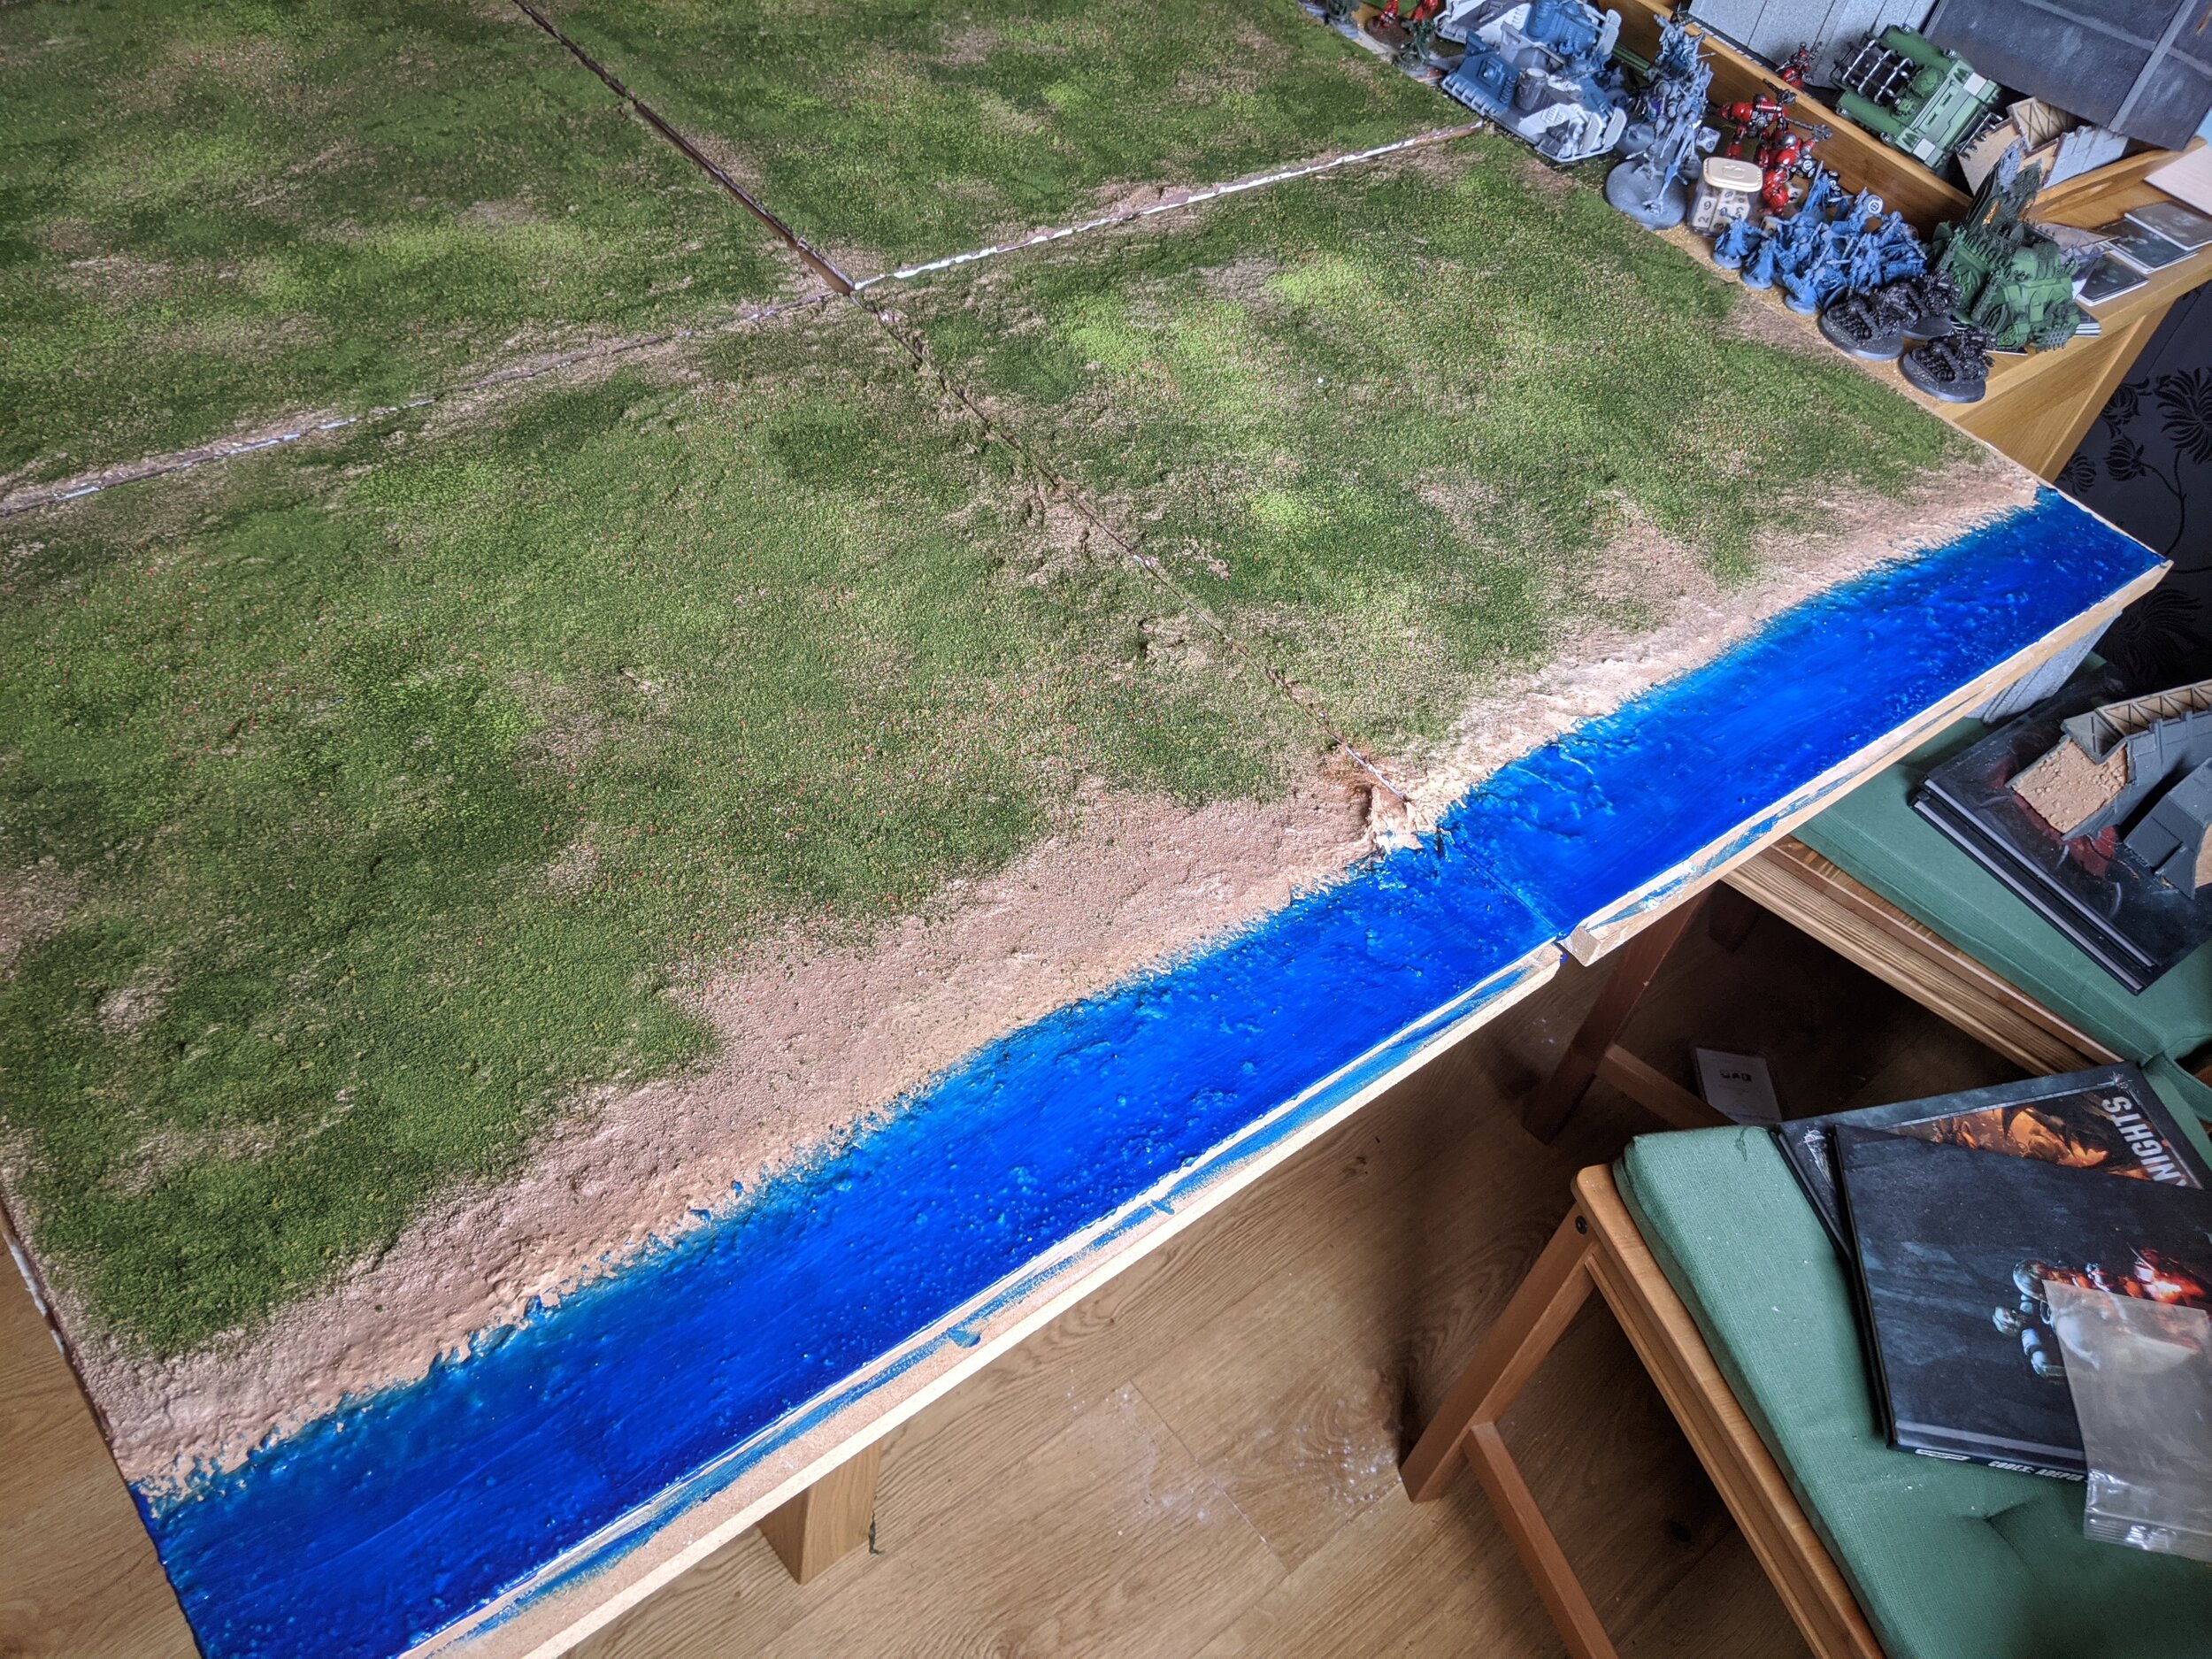
I needn’t have worried. Whilst it turned out a little bluer than I’d hoped it still looks pretty good and matches the enhanced realism of much of wargaming miniatures and terrain. The gel medium captured enough of the brushstrokes to give the impression of waves as it catches the light without being overbearing.
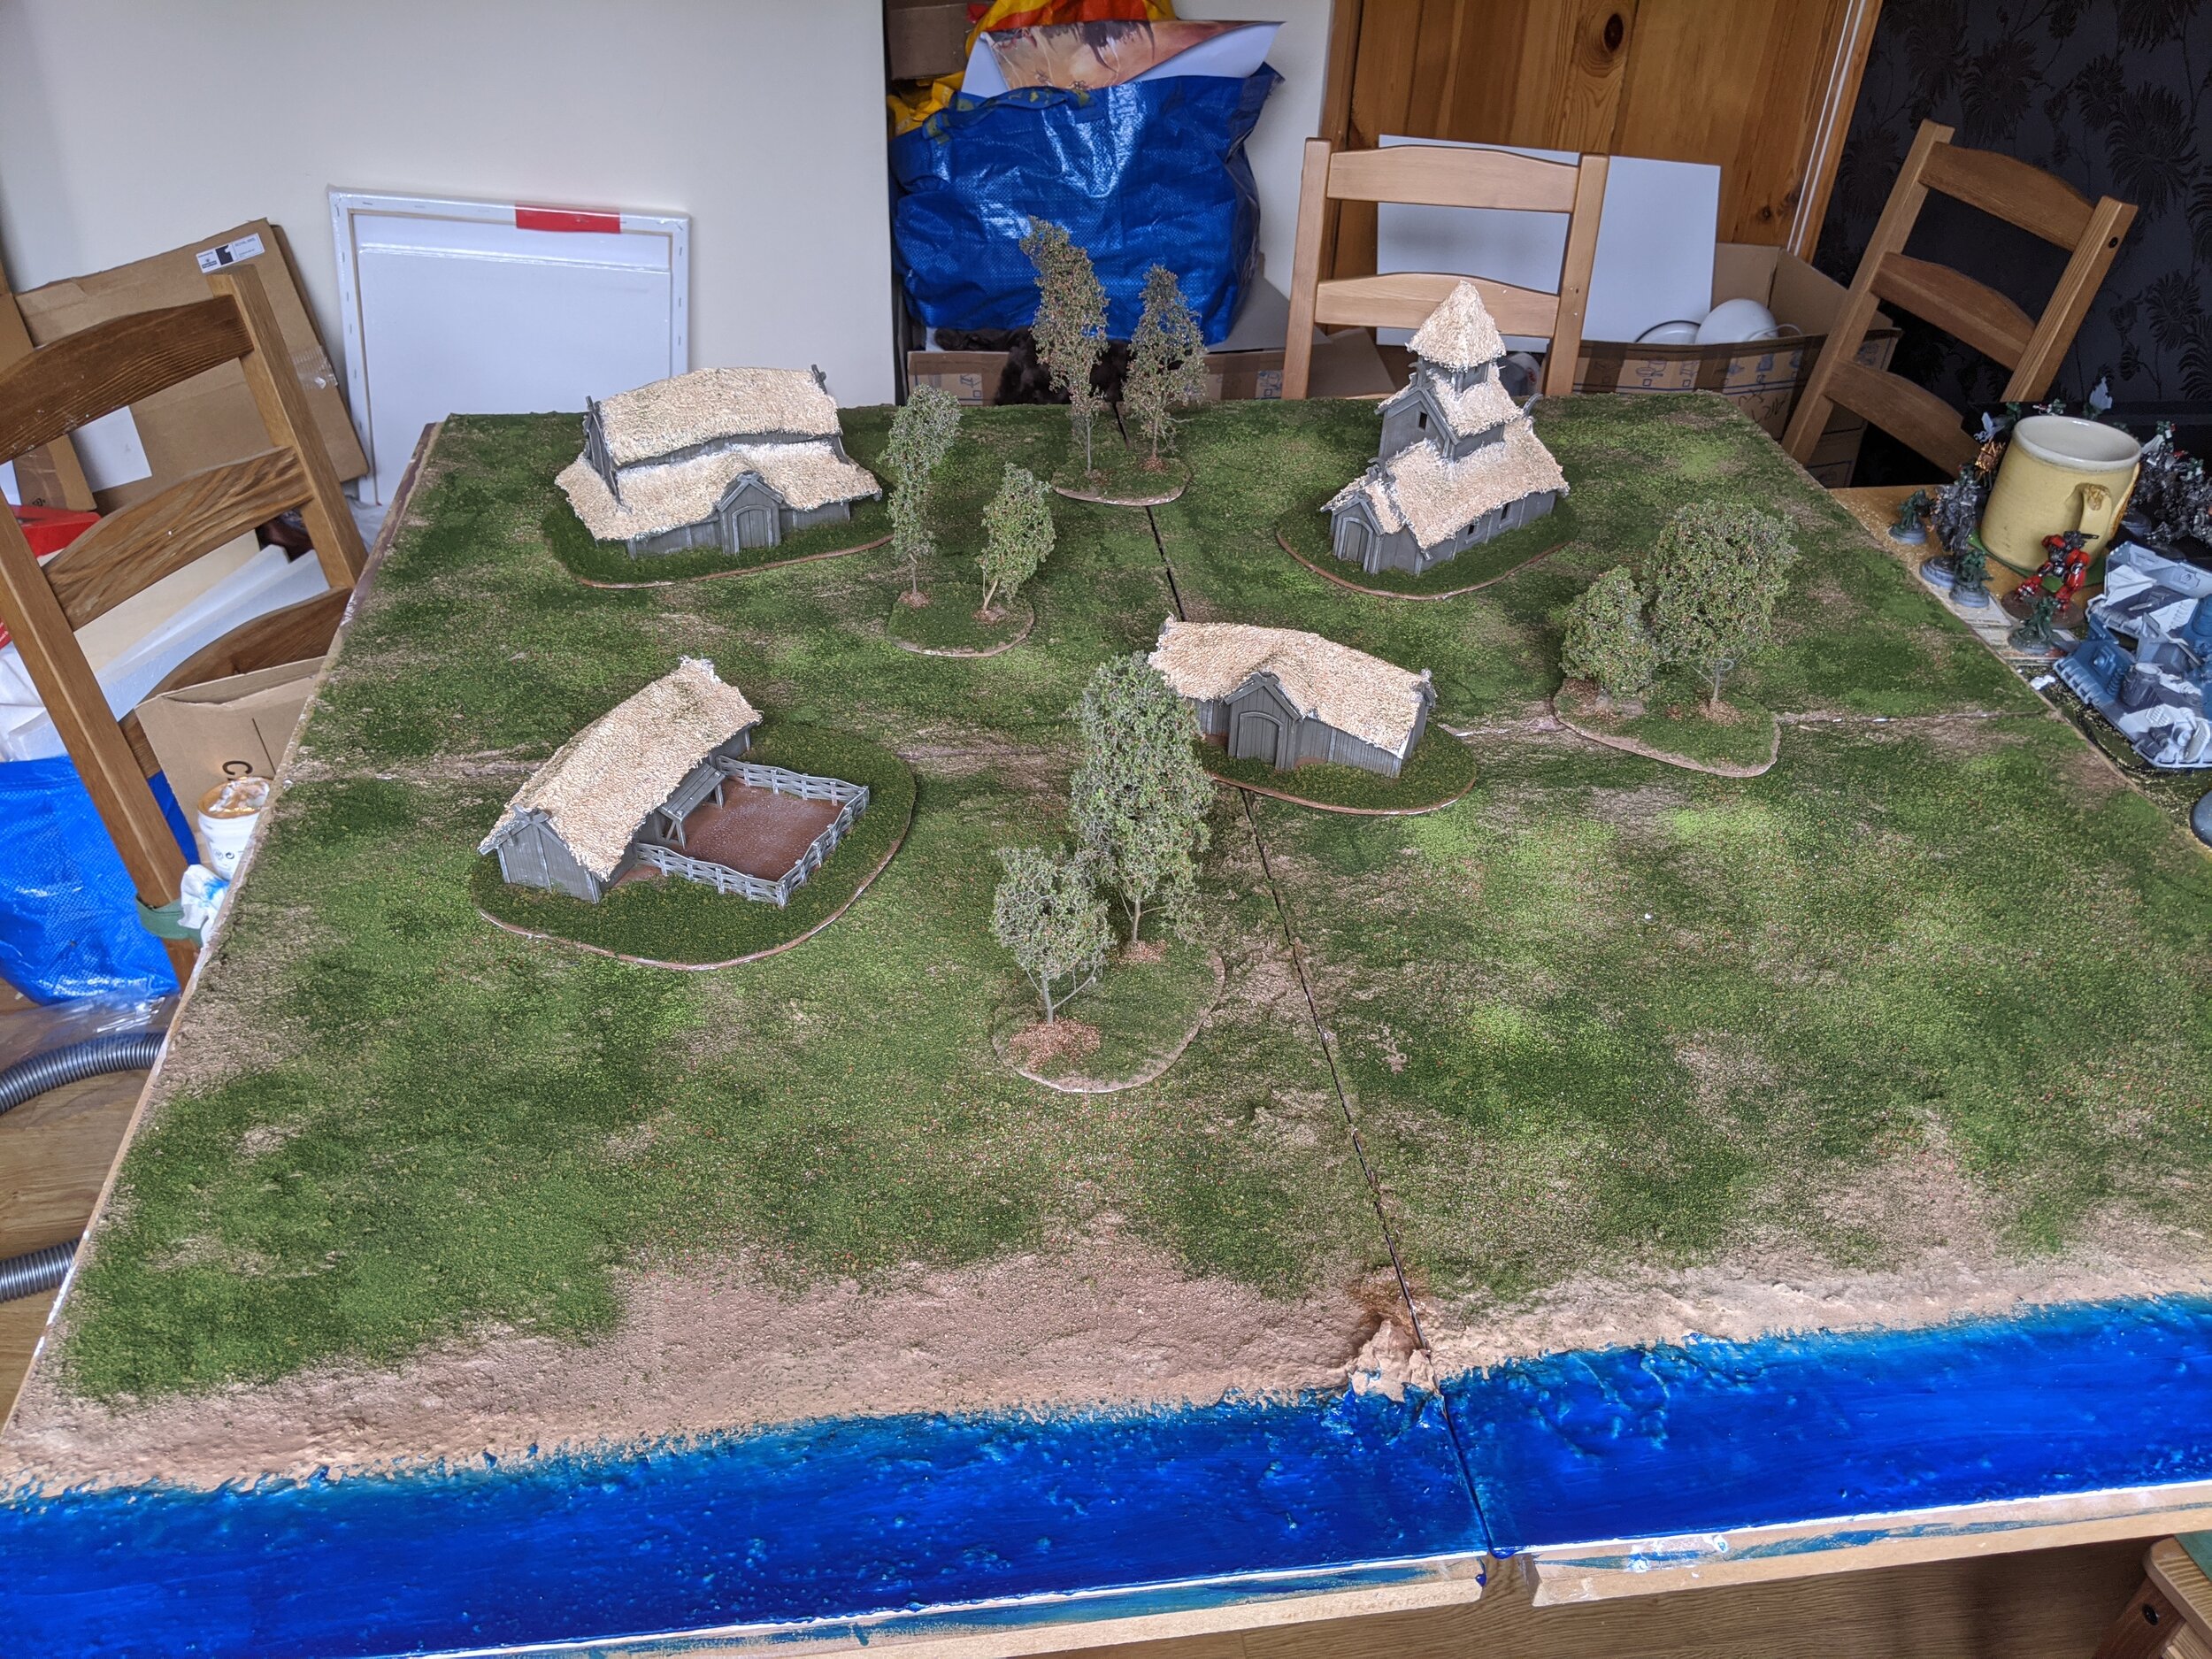
All that was left was to lay out the terrain on the table. I’m not super happy with the basing of the buildings, but it’s going to be easy enough to take them off and redo them in the same was as I based the trees.
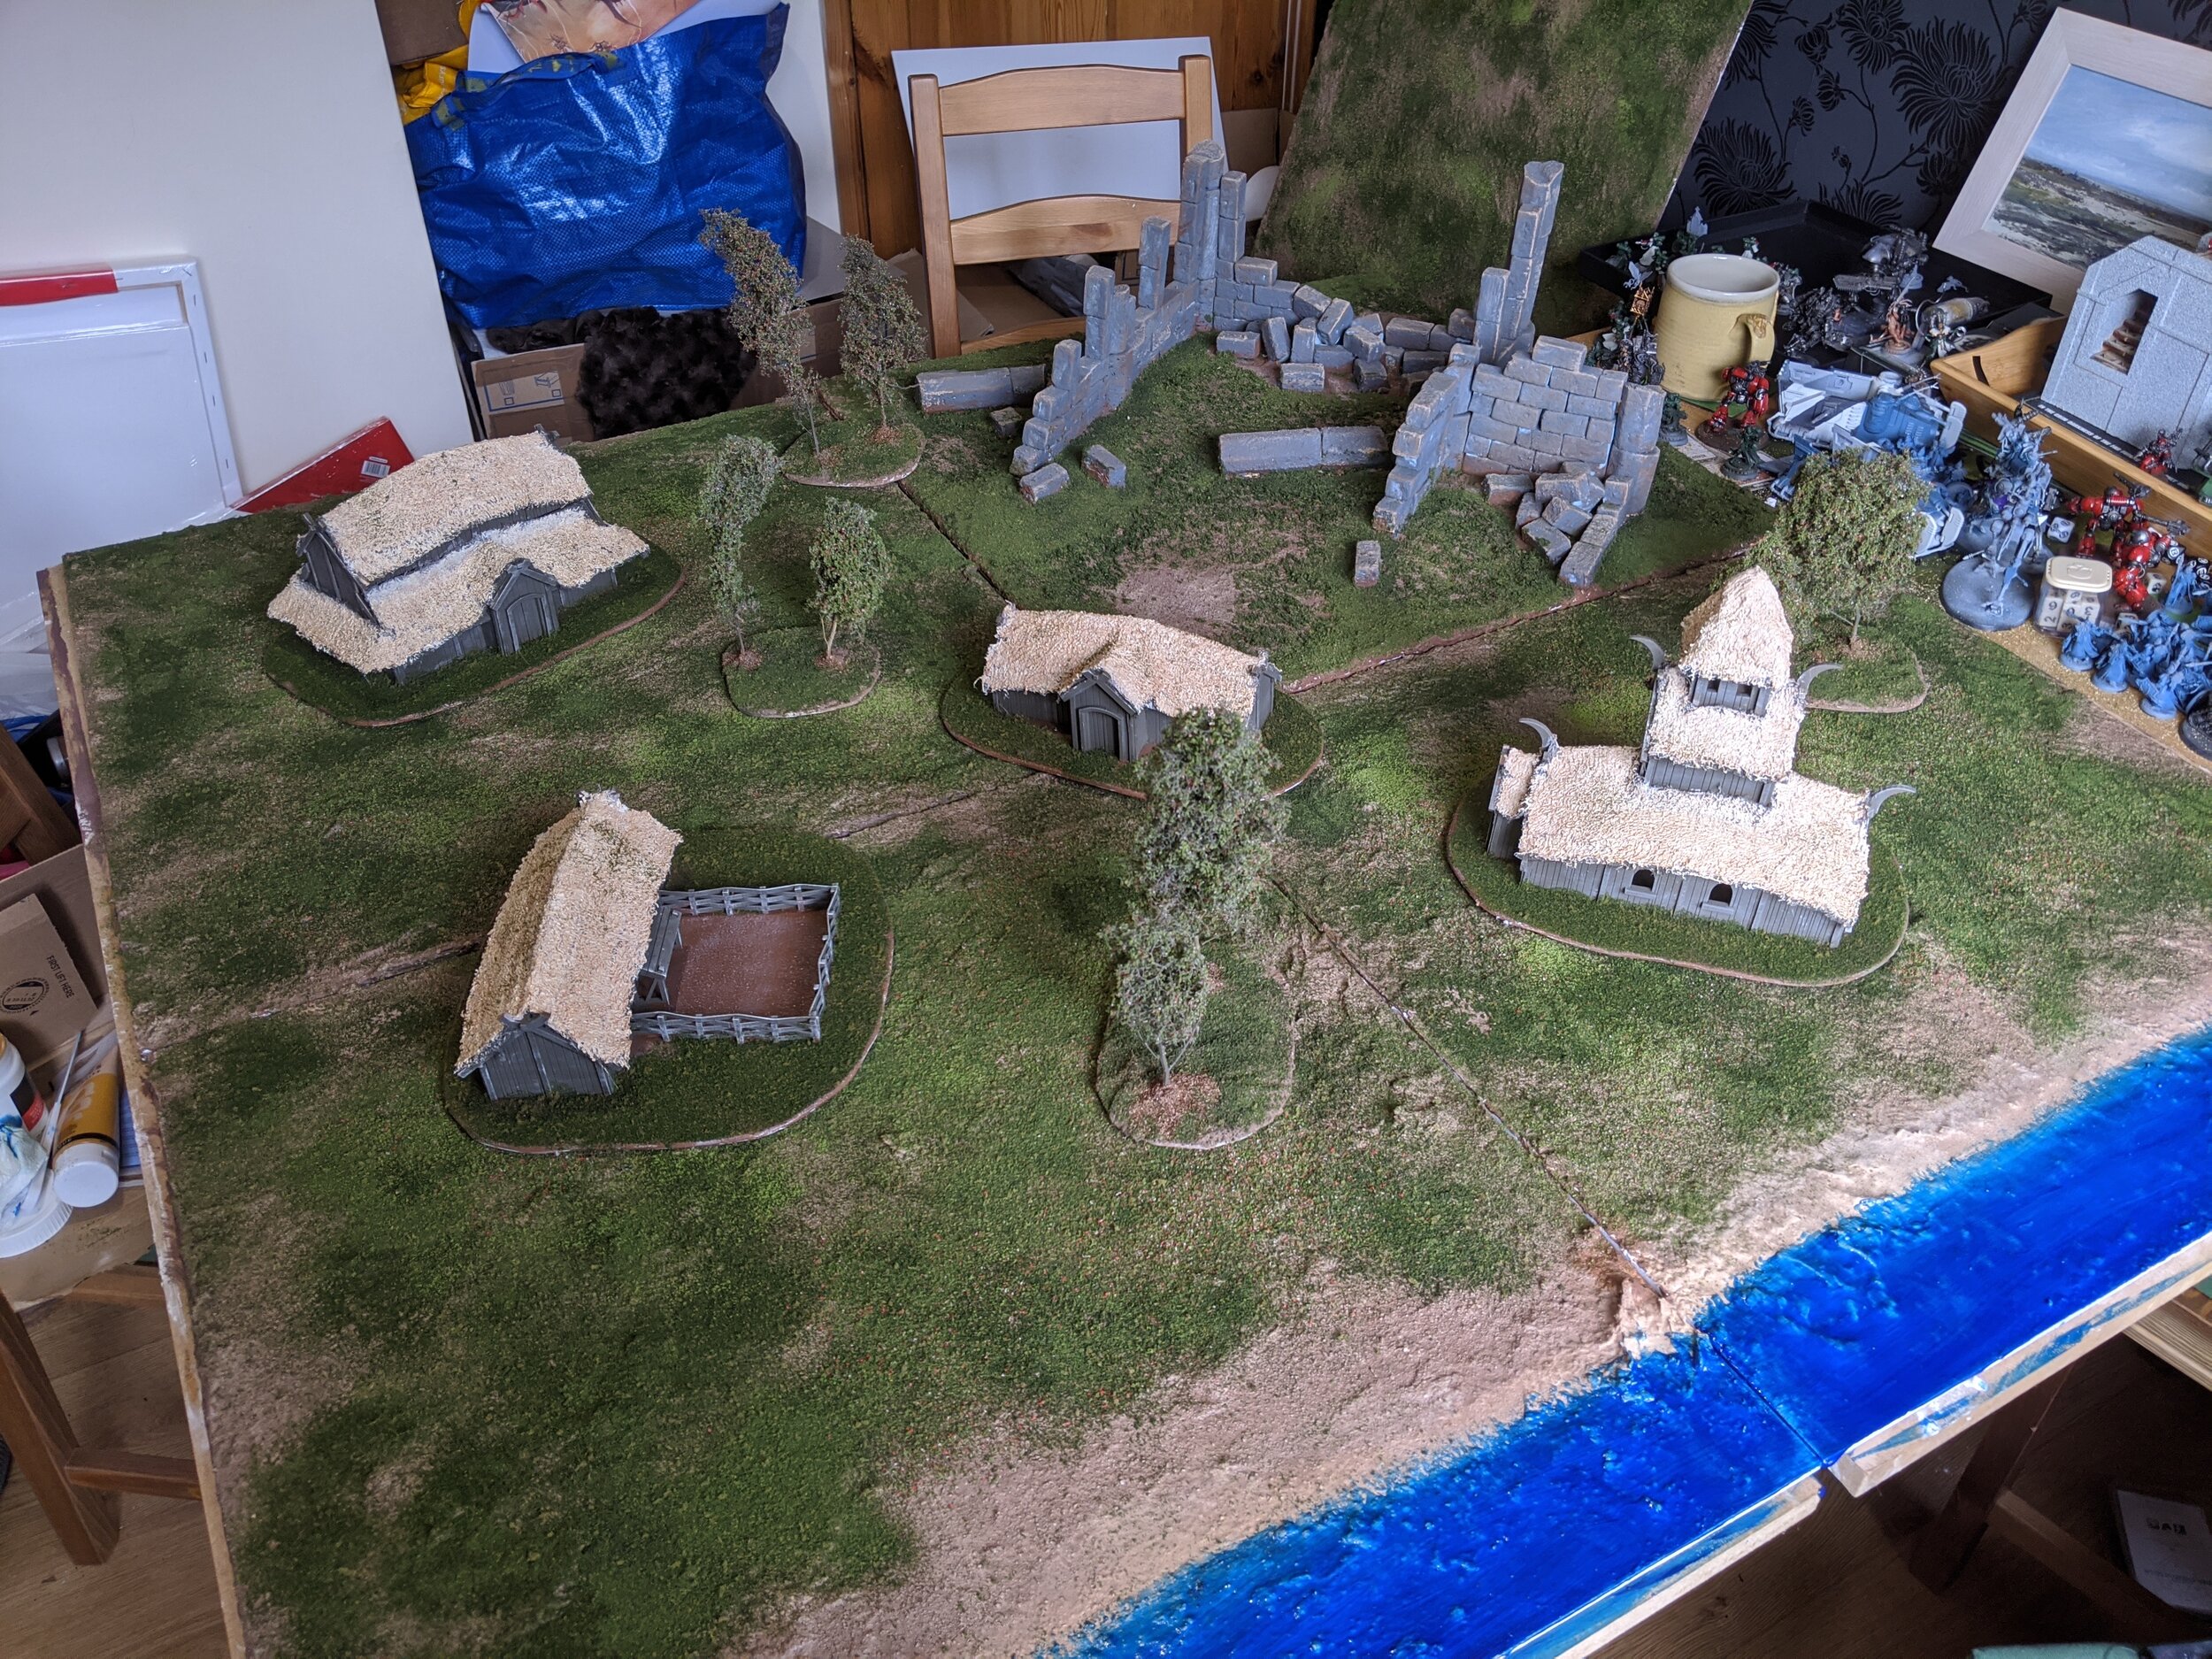
I’ve had a single tile with a ruined cathedral on it for some time and as it’s based with the same flock I realised I could swap out one of the two fully land tiles for it. It complements it nicely and sets up well for playing viking era scenarios with Saga. The stonework needs some touching up but nothing major.
The whole project took about a week’s worth of evenings and lunches and makes me inordinately happy to have completed it. There’s still work to do. In addition to the aforementioned touchups I’d like to do a few more buildings and two more tiles to extend it to a full six by four foot layout. I purposefully didn’t put any scale indicators on the tiles themselves so that I could use it for everything from 6mm to 32mm (I don’t play any scales bigger than that, yet) and I’ve got plans for doing a city layout for Adeptus Titanicus at some point soon.